Professional workflow scripting
This section covers a lot of ground, but there's a lot more to workflow scripts that can be covered in a single tutorial - stay tuned for a comprehensive workflow scripting reference.
Use data-bound hidden labels to keep track of changes
The workflow script updates each and every row in the contact reference
table that the user does not mark for deletion, each time a contacts mobile
form arrives on the cloud. This is because it cannot detect the changes that the user made,
or even if the user made any changes.
What if you have two users using the same contacts list, and they happen to update it at the same time? All of the changes that the first user submits will be lost when the second user submits his or her changes, even if they modified different rows. Your workflow script needs to be ready for this scenario.
What your script needs is a reference that it can compare the user input with:
label controls that you also bind to the same reference data.
The text boxes and labels start out with the same values, but the user can edit the values in the text boxes and the drop-down, and not the values in the labels. When the user submits the form, your server-side script will be able to compare the values in the user-editable controls with the non-editable values, and only update the rows that the user actually modified.
Important! To follow along with this tutorial, and simulate two users who edit the same reference table, you will need two separate Android devices. If you've only got one, use a desktop Android emulator such as BlueStacks.
-
Add a hidden (
visible="false") label below each of the text boxes and the drop-down. Make the labels reference the same column of thecontactreference table as the editable control above them.... <Control type="panel" layout="table" name="contactsTable" ...> ... <Control type="textbox" name="columnName" label="Name" reference="SELECT @1" ref_arg="PARENT.col1"/><Control type="label" name="hiddenName" visible="false" reference="REF" ref_arg="PARENT.col1"/><Control type="textbox" name="columnPhone" label="Phone" reference="SELECT @1" ref_arg="PARENT.col2"/><Control type="label" name="hiddenPhone" visible="false" reference="REF" ref_arg="PARENT.col2"/><Control type="link" name="phoneLink" link_type="phone_number" label="Call Contact" text="Call" link_target_reference="REF" link_target_ref_arg="../columnPhone" /> <Control type="combobox" choice="dropdown" name="columnCategory" label="Category" value_reference="SELECT @1" value_ref_arg="PARENT.col3" reference="SELECT 'Head Office' UNION ALL SELECT 'Colleague' UNION ALL SELECT 'Auto Service' UNION ALL SELECT 'Emergency'"/><Control type="label" name="hiddenCategory" visible="false" reference="REF" ref_arg="PARENT.col3"/><Control type="textbox" name="columnAddress" label="Address" reference="SELECT @1" ref_arg="PARENT.col4"/><Control type="label" name="hiddenAddress" visible="false" reference="REF" ref_arg="PARENT.col4"/><Control type="link" name="googleMapsLink" link_type="address" label="Find on map" text="Find" link_target_reference="REF" link_target_ref_arg="../columnAddress" /> <Control type="textbox" name="columnMail" label="Mail" reference="SELECT @1" ref_arg="PARENT.col5"/><Control type="label" name="hiddenMail" visible="false" reference="REF" ref_arg="PARENT.col5"/></Control> ... -
Save the form, and make the necessary changes to the workflow script for the magic to start working.
Upgrade your workflow script again: don't update reference data that did not change
In your new and upgraded workflow script, the basic unit of change is no longer the complete reference table: it will selectively update only the rows that the user has modified.
You are taking things one step at a time: This workflow script cannot handle the cases when different users of the form make conflicting changes to the same row. You'll make one that is ready for conflicting changes in the next tutorial.
-
Inside the first
forachloop, introduce themarkedDeletedvariable to mark the rows that the user wants to delete. You'll find the script much easier to manage if you do.Introduce the
isEditedvariable to mark the rows that the user has modified in any way. Do this by comparing the values in the text boxes in the form with the hidden labels right below the text boxes.In the top
foreachloop, make the script delete the current row if it is checked, like before, but only update the current row if the user has edited it:server program contactUpdater for form contacts using reftab contact; { foreach(var row in form.root.contactsTable) {var markedDeleted = row.deleteContact.value == "true"; var isEdited = row.columnName.value != row.hiddenName.value || row.columnPhone.value != row.hiddenPhone.value || row.columnCategory.value != row.hiddenCategory.value || row.columnAddress.value != row.hiddenAddress.value || row.columnMail.value != row.hiddenMail.value;if(markedDeleted) db.contact.Delete({id:row.idLabel.value}); else if(isEdited)db.contact.Update({id:row.idLabel.value},{ name:row.columnName.value, phone:row.columnPhone.value, category:row.columnCategory.value, address:row.columnAddress.value, mail:row.columnMail.value}); } foreach (var row in form.root.addContact) db.contact.Insert({id:row.newContactIdLabel.value, name:row.newContactName.value, phone:row.newContactPhone.value, category:row.newContactCategory.value, address:row.newContactAddress.value, mail:row.newContactMail.value}); } -
Overwrite the workflow script when saving the new one, and publish the solution artifacts as usual.
-
To test whether your new workflow script is working as you want it, you need to simulate a second, remote user who modifies the same reference table that you are working on, while your device is not syncing.
Ideally, you need two Android devices to pull this off, but you could use desktop emulators in a pinch (see note at the top of the page). What you definitely need to have is two separate Rocky Jupiter user accounts registered at the Backoffice:
-
Go to the Users tab, and click the New user link.
-
On the screen that pops up, enter the details for the new user account, and click the Create link. Activate the new user account just as you did your original developer account. Assign the Vehicle Inspection form to the new user.
-
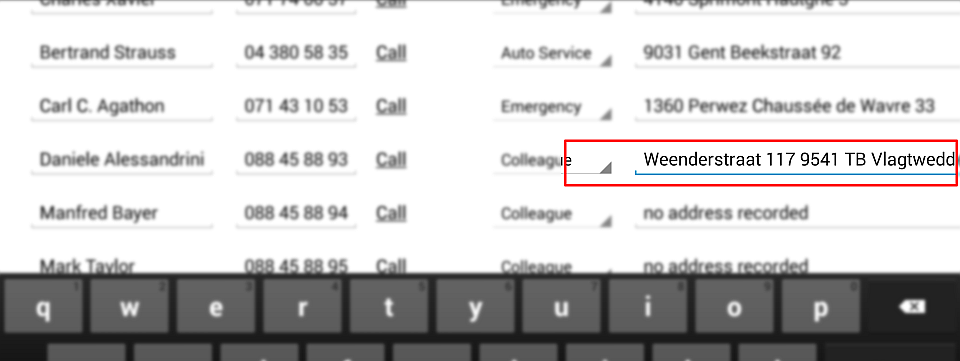
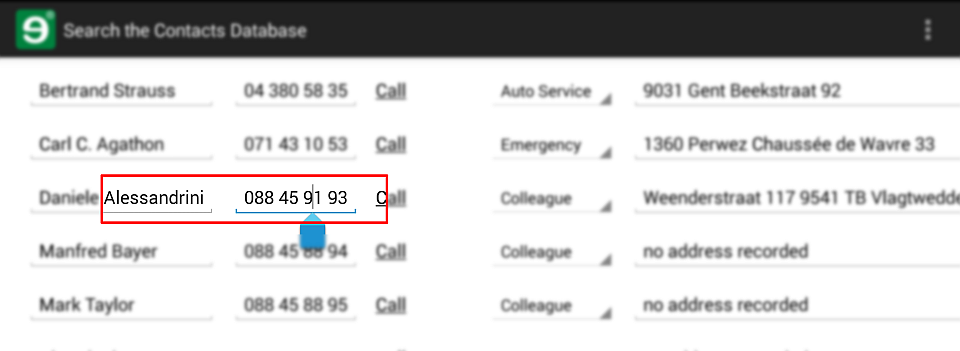
Open the form on both of the devices, and make a change to the contacts list on one of them. Submit the form while it is open on both devices.
Figure 113. Edit the contacts list on of of the mobile devices: this is Daniele Alessandrini's new address
-
On the second device, make a different change to the reference table, and submit the form on this one too.
-
-
Synchronize both devices to download the newest version of the reference table. Check that neither of your changes was lost.
Now that you're quite skilled at writing Mobilengine server-side scripts, you can go on to perfect this script.


