You'll be learning about data-binding in webforms:
This section is a detour of sorts. For a short while, you'll be leaving the exciting world of Rocky Jupiter to concentrate on data-binding itself, without any use case to distract you. When you get back to the admin webforms, you'll be more than prepared to tackle your first drop-down list.
Data-binding is an essential feature of both the mobile form language and the webforms language. It is perhaps the single most useful technique a Mobilengine developer such as yourself can have.
The basic idea is that instead of hard-coding a specific value for a control, you put a reference into the control (aka bind the control to) to one or more properties of another control, to a reference table, or to a system parameter, and pull data into your control from them. You want to do this primarily because the data-bound control will always be up-to-date - its value changes in real time when the referenced resource changes
Webforms-brand data-binding is based on SQLite query syntax, with the most important difference being that unlike SQLite, it is strongly typed, which allows compile time type-checking. You won't need to be an expert on SQLite to use webforms data-binding, but if you do get stuck at any point, an SQLite tutorial will definitely help. For specifics, see the Webforms Data-binding Reference.
Binding a static value into a single-value variable
First things first: since the examples below don't form part of the Rocky Jupiter scenario,
you need a separate artifacts folder to hold them. Create a new folder and name it
webDataBinding.
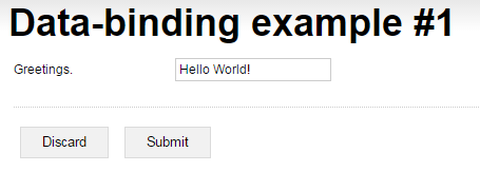
The most basic type of data-binding is a query statement that returns a static result.
In the webforms language, query statements are wrapped inside curly brackets. Put a string
{"between quotes inside braces"}, declare it as the text property of a
display control, and you've got yourself a data-bound
control.
In webforms, unless you're pulling data from a reference table, a table
expression, or a table control (basically anything that you would need to reference using
the FROM operator), you don't need the SELECT keyword
at the start of a query statement.
Save the code inside the
webDataBinding folder, and publish through the mebt as
usual, then open the form on the webforms website.
Static query results have their uses when you want to give a drop-down or a text box a
default value, but, you could just as well hard-code a string into the control. Another
limitation is that a static query such as this would only work for scalar string-type
properties. There is much more to data-binding than this.
Binding the value of a control into a single-value variable
You can make the value of a control actually depend on the user input on another control by referencing the user-editable control in the query statement. The data-bound control will dynamically, and in near-real-time take on the value of the referenced control.
In the webforms language, all this takes is sticking a reference to the control in question
into the query statement of the control you'd like to data-bind, using the
{referenced-control-id.referenced-property-name}
syntax.
When referencing other controls in the form, you need to be aware of the controls' naming scopes. Read up on the concept in the webforms reference.
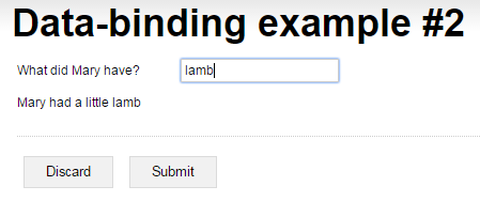
Save, publish, and open this form online. Enter words into the text box, and see them
appear in the textview control below it. Its direct counterpart in the mobile form language is the
label control.
Binding a list of static values into a control
If you'd like to reference and display a list of values or the rows and/or columns of a table instead of a scalar value, you'll want to put something in the query statement that returns a table value: a reference table, a table control, a table control's rows property (more on this soon), or a table expression.
You'll see how to use each of these in a query statement. For this example, a table expression, a concept specific to webforms, should work best.
A table expression is similar to the UNION ALL operator that you used in the mobile forms to set up lists of static queries: it stitches together values into columns and rows. However, you can use dynamic query statements in the table expression 'cells', as long as they return a single value.
TABLE column1, column2, column3
    (row1column1, row1column2, row1column3;
    row2column1, row2column2, row2column3;
    row3column1, row3column2, row3column3)
Figure 162. Table expression syntax
You can have as many columns and rows as you need. Note the TABLE
keyword that sets up the expression, and the semicolons that separate the rows inside the
expression body.
You could put the table expression into any control that can display a list of values, but why not make it a table control? Tables in webforms rely on data-binding to populate their rows, and headers and footers, if any.
<form id='example03'
  menuName='Data-binding example #3'
  platforms='web'
  xmlns='http://schemas.mobilengine.com/fls/v1'>
  <table id='table1' label='How are you feeling today?'
    recordset='{TABLE column1, column2
                    ("Okey", "Dokey";
                    "Topsy", "Turvy";
                    "Hunky", "Dory")}'
    record='r'>
    <row>
      <cell>
        <textbox text='{r.column1}' />
      </cell>
      <cell>
        <textbox text='{r.column2}' />
      </cell>
    </row>
  </table>
</form>
The table1 table control takes a recordset property that specifies the source of the tabular
data (this is where you have the table expression), and a row template, defined by the
children of the row element inside the table, and generates one row based
on the template for each of the rows that the query statement in its
recordset property returns.
The rows in a table control are generated via data-binding, based on the template: you
reference the rows that the query statement returns using the record
iterator variable. The iterator variable cycles through each of the rows in turn, and you
can use the
{iterator-variable.column-name}
query to pull the value from each of the fields in a given column of the query result one by
one.
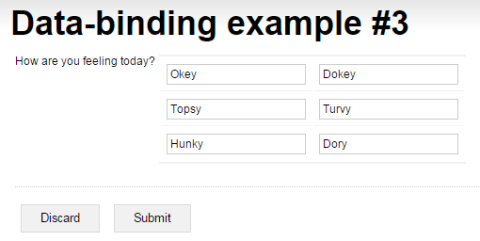
Save the form, publish it, and access it online. Since the fields of the table in
Data-binding example #3 are text boxes, you can enter any text you
like, but their initial values will be taken from the table expression in the
table1 recordset.
Figure 163. When the form loads, the text boxes display the static recordset of the
table1 table control
Filtering rows dynamically based on the value of a control
You may very reasonably want to filter the rows that a table displays based on user input. This is quite easily done.
Since it's the query statement in recordset that determines what can be
displayed in the row template, this is what you need to fiddle with to make filtering
happen.
All you need is some conventional SQLite query syntax: a SELECT ... FROM
statement that includes a
WHERE
clause and the
LIKE
clause to return only the rows that match
the input in the filterbox text
box.
<form id='example04'
  menuName='Data-binding example #4'
  platforms='web'
  xmlns='http://schemas.mobilengine.com/fls/v1'>
  <textbox
    id='filterbox'
    label='Filter the moods in the table'
    text='{""}'/>
  <table
    id='table1'
    label='How are you feeling today?'
    recordset='{SELECT t.column1, t.column2
                FROM (TABLE column1, column2 ("Helter", "skelter";
                                              "Okey", "dokey";
                                              "Topsy", "turvy")) t
                WHERE t.column1 LIKE filterbox.text || "%"}'
    record='r'>
    <row>
      <cell>
        <textview text='{r.column1}' />
      </cell>
      <cell>
        <textview text='{r.column2}' />
      </cell>
    </row>
  </table>
</form>
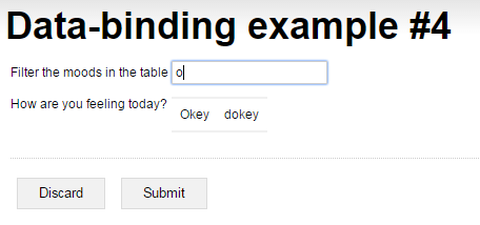
This is essentially the same technique you used in mobile form data-binding when you narrowed the choices for a drop-down through user input. The only real difference here is the table expression that sets up the reference data.
Figure 164. The query statement in the table1 table control filters the static
recordset based on the input in the filterbox text box
Save, publish, and open the form online to test the behavior. Neato.
Processing the query result from a table control
Just like the SQLite database language it is based on, Mobilengine data-binding includes functions to process the query results inside a query statement. Query functions are like the formulas in Microsoft Excel that count, average, round down or up, or make various calculations on a range of values in the spreadsheet.
In fact, you've already used query functions: in the mobile form language flavor of data-binding, you've counted and added up controls in your form. The webforms variety of data-binding has way more query functions to process the data that the query returns.
A complete webforms reference, that describes all the query functions in detail, will soon be available.
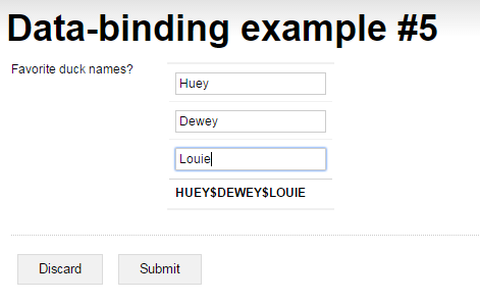
The query
in the footer of table1 in the code below, for instance, references the
string input in the generated rows of the table control, as an ordered list of strings. You
can reference the controls in the row template using the rows property of a webforms table control after the FROM
operator in the query:
table-id.rows.table-alias
<form id='example05'
  menuName='Data-binding example #5'
  platforms='web'
  xmlns='http://schemas.mobilengine.com/fls/v1'>
    <table id='table1' label='Favorite duck names?'
  recordset='{TABLE column1 (""; ""; "")}'
  record='r'>
    <row>
      <cell>
        <textbox id='textbox1' text='{r.column1}' />
      </cell>
    </row>
    <footer>
      <row>
        <cell>
          <textview text='{SELECT UPPER(GROUP_CONCAT (t.textbox1.text, "$"))
                          FROM table1.rows t}'/>
        </cell>
      </row>
    </footer>
  </table>
</form>
The
UPPER function converts the strings in the list that the query statement
returns to uppercase, and the GROUP_CONCAT function joins them up with the
separator you specify ("$").
Save, publish, and open online. Enter text in the table to test the footer query. Modify
the GROUP_CONCAT query function to change the separator character to
whatever you fancy. Have fun.
Figure 165. The control in the footer row uses functions in its query statement to convert the
list of user input strings in the table to uppercase, and then join them using the
$ character
Inserting conditions to show or hide content in a form
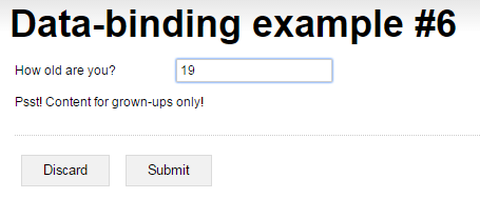
Dynamically showing or hiding content based on user input is something you simply have to
be able to do. In the mobile form language version of data-binding, you had to trick a
dynamic list to make this happen. In webforms, there's a dedicated if element with a
cond(ition) property. The child elements of the if will
only appear in the form if the condition evaluates to true.
Webforms
queries are strongly typed, so you need to apply the TOINT function to
the user input to be able to compare it to an integer.
Save, publish, and view online. Lie about your age if you must to make the age-restricted text appear.
Figure 166. The text below the text box is only displayed if the input in the text box meets the condition that you specify
Setting up a data-bound drop-down list control
The complete data-binding section has been building up to the drop-down list, and here it is. A drop-down is a typical candidate for data-binding: the whole point of this type of control is to present dynamically updating options. The webforms implementation of the control, however, is slightly more involved than you'd expect.
The choices property, which specifies the list of options in a drop-down
is a query that binds to a reference table, a table expression, or a table-value property:
no problem there.
The drop-down, however, needs two more query statements that reference the query result in
choices: one that returns a (scalar or record) value that identifies the
options that the user can select. This is called keyMap in the webforms
world. The other query specifies the options that the drop-down presents to the user (aka
the text of the choices). This is the textMap property.
Nearly always, keyMap and textMap return a column of the
table that you reference in
choices.
<form id='example07'
  menuName='Data-binding example #7'
  platforms='web'
  xmlns='http://schemas.mobilengine.com/fls/v1'>
  <dropdown
    id='dropdown1'
    label='Pick your weapon:'
    choices='{TABLE column1, column2, column3, column4
             (1, "Rock", "BEATS: Lizard, Scissors", "LOSES TO: Spock, Paper";
              2, "Paper", "BEATS: Rock, Spock", "LOSES TO: Lizard, Scissors ";
              3, "Scissors", "BEATS: Lizard, Paper", "LOSES TO: Spock, Rock";
              4, "Lizard", "BEATS: Spock, Paper", "LOSES TO: Rock, Scissors";
              5, "Spock", "BEATS: Scissors, Rock", "LOSES TO: Lizard, Paper")}'
    keyMap='{column1}'
    textMap='{column2}'/>
  <textview label='Selected key:'
    text='{TOSTRING(dropdown1.selectedKey)}'/>
  <textview label='Selected text:'
    text='{dropdown1.selectedText}'/>
  <textview label='Selected value:'
    text='{TOSTRING(dropdown1.selectedValue.column1) || " - " ||
          dropdown1.selectedValue.column2 || " - " ||
          dropdown1.selectedValue.column3 || " - " ||
          dropdown1.selectedValue.column4}'/>
</form>
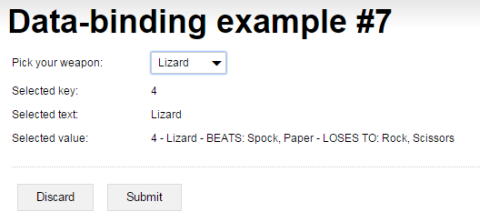
You can reference the user selection in a drop-down in a number of ways, demonstrated in the code above:
Save, publish, open online, and find out about your options. You've got the first steps to building a simple game in a webform right here.
Figure 167. The drop-down list displays the rows in its static recordset as options. The controls below the drop-down reference various fields of the recordset row that the user selected
Now that your data-binding muscles are pumped, you're ready to go back to the
newTask webform, and make it dynamic like it's nobody's business.

