In the previous section, you've made sure that the Rocky Jupiter administrators can add a new task to drivers' delivery lists. The Rocky Jupiter workflow is completely functional, but the company want to have certain extra features.
The administrators need to be able to view the list of current delivery tasks, and make changes to them as necessary. Perhaps the clients change their minds about the delivery address or the due date for a pending delivery task, and the drivers, via their dashboard form, data-bound to the company database, need to be alerted to any change in a task.
Pulling a reference table into a table control, no frills
No need to worry about user edits to the assignments reference table just
yet - you'll cross that bridge when you get to it. For now, let's just display the list of
delivery tasks in the webform. The most convenient way would be to set up a table control
and pull the assignments reference table into it. You've used a table control in a webform before, and you've already queried a reference table when you populated your first real drop-down control - all you need to do is combine the two techniques in a
single webform.
<form id='list'
  menuName='Rocky Jupiter Deliveries'
  platforms='web'
  xmlns='http://schemas.mobilengine.com/fls/v1'>
  <table
    id="taskList"
    recordset='{SELECT a.usr, a.assignment_id, a.client,
                a.load_address, a.load_type, a.load_date, a.due_date,
                a.unload_address, a.comments, a.photo_load, a.photo_unload,
                a.status FROM assignments a}'
    record='task'>
    <header>
      <row>
        <cell>
          <textview id='driver' text='Driver'/>
        </cell>
        <cell>
          <textview id='client' text='Client'/>
        </cell>
        <cell>
          <textview id='loadType' text='Type of Cargo'/>
        </cell>
        <cell>
          <textview id='loadAddress' text='Load Address'/>
        </cell>
        <cell>
          <textview id='deliveryAddress' text='Delivery Address'/>
        </cell>
        <cell>
          <textview id='dueDate' text='Due Date'/>
        </cell>
        <cell>
          <textview id='status' text='Status'/>
        </cell>
        <cell>
          <textview id='comments' text='Comments'/>
        </cell>
      </row>
    </header>
      <row>
        <cell>
          <textview text='{task.usr}'/>
        </cell>
        <cell>
          <textview text='{task.client}'/>
        </cell>
        <cell>
          <textview text='{task.load_type}'/>
        </cell>
        <cell>
          <textview text='{task.load_address}'/>
        </cell>
        <cell>
          <textview text='{task.unload_address}'/>
        </cell>
        <cell>
          <textview text='{FORMATDTL(task.due_date,(dtf yyyy"/"MM"/"dd))}'/>
        </cell>
        <cell>
          <textview text='{task.status}'/>
        </cell>
        <cell>
          <textview text='{task.comments}'/>
        </cell>
      </row>
  </table>
</form>
Like
all table controls taskList requires a recordset property that specifies the source of the tabular data
that it displays. This is where you put the query to the assignments
reference table.
Remember: in webform queries, whenever you're referencing a reference table or a table column in a query, you need to include an alias.
If the details of how to set up a table control in a webform seem vague, feel free to check back to where you first coded one.
The header (and footer) element is a sort of intruder in
the table control: it has its own row child element, but only one row of
static cells will appear inside it. The cells that you insert inside the
row in the header (or the footer) will
appear in the table, and that's that.
Save the form, publish (via the mebt tool, remember), and view it on the webform webpage.
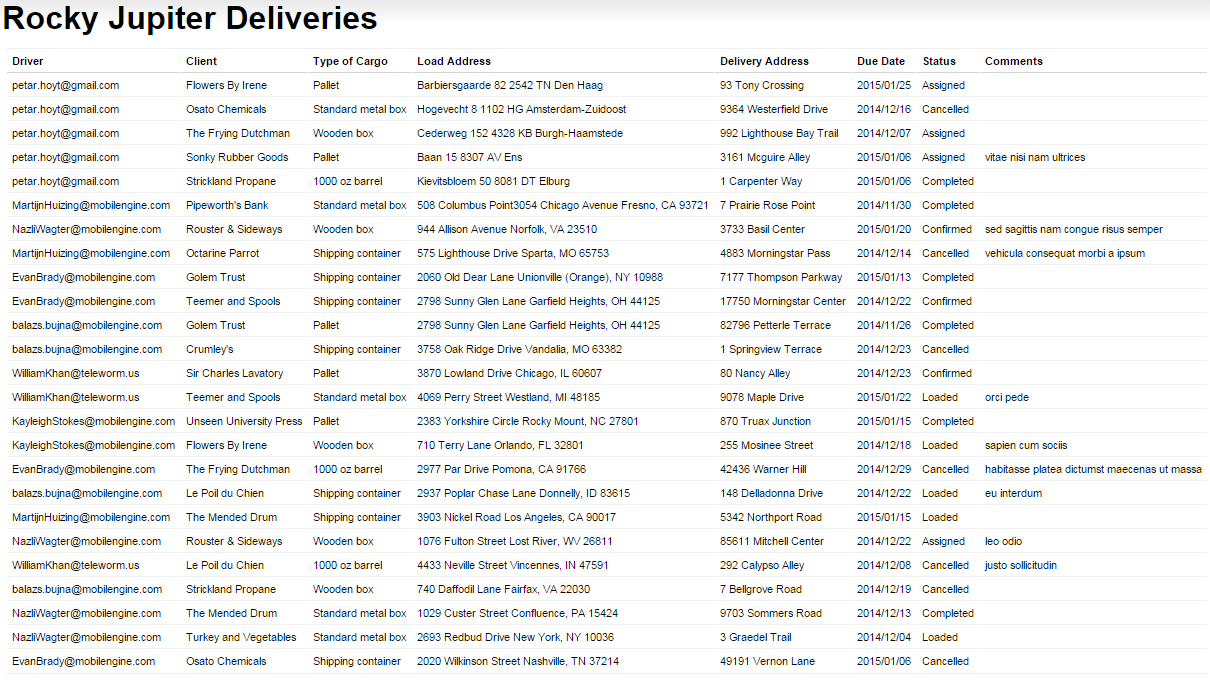
Figure 177. The table control in your new webform, displaying the relevant columns of the
assignments reference table
The reference table is displayed in the taskList table control
without a hitch: the fun can begin in earnest.
Adding your fancy filters
What the Rocky Jupiter people would like you to do is quite reasonable: let their administrators filter the list of deliveries by the driver they are assigned to, the client who ordered them, the type of container the cargo is to be shipped, and the current status of the tasks. The most convenient way would be to have a drop-down list for each of these filter criteria: the table should then only display the entries that meet the selected criteria.
Apart from this, since the assignments reference table that you bind into
the taskList only includes the drivers' e-mail addresses, and not their
names, the list is much less informative and clear than it could be.
The solution is pretty simple: you need to bind the reference tables that hold the complete
list of drivers (including their names) into taskList, and replace the
textview controls in the header that display the drivers' names, the
cargo types, and the clients with drop-down lists that are data-bound to the
drivers, cargoTypes, and the clients
reference tables, respectively. You will then be able to filter the query result from the
assignments table based on the user selection in the header. Of these
reference tables, only clients is actually new: download its reference table declaration file, and an input data spreadsheet that includes it.
As for the list of available task statuses, you can build a table expression for them,
can't you? (Pro tip: it's TABLE status ("Assigned"; "Confirmed"; "Loaded";
"Completed"; "Cancelled").
Fine, now you've got 3 reference tables and a table expression. How do you make the query
statement in the recordset of taskList reference more than
one of these at once? If two (or more) reference tables share a column, you can use the
SQL (INNER) JOIN operator to select columns from any of
them.
<form id='list'
  menuName='Rocky Jupiter Deliveries'
  platforms='web'
  xmlns='http://schemas.mobilengine.com/fls/v1'>
  <table id="taskList"
    recordset='{SELECT u.name driver, u.userid userid, a.assignment_id,
                a.client, a.load_address, a.load_type, a.load_date, a.due_date,
                a.unload_address, a.comments, a.photo_load, a.photo_unload,
                a.status FROM assignments a
                JOIN drivers u ON a.usr = u.userid
                WHERE (driverFilter.selectedKey IS NULL
                 OR a.usr == driverFilter.selectedKey)
                AND (clientFilter.selectedKey IS NULL
                 OR a.client == clientFilter.selectedKey)
                AND (loadFilter.selectedKey IS NULL
                 OR a.load_type == loadFilter.selectedKey)
                AND (statusFilter.selectedKey IS NULL
                 OR a.status == statusFilter.selectedKey)}'
    record='task'>
    <header>
      <row>
        <cell>
          <dropdown
            id='driverFilter'
            choices='{SELECT u.userid, u.name FROM drivers u}'
            keyMap='{userid}'
            textMap='{name}'/>
        </cell>
        <cell>
          <dropdown
            id='clientFilter'
            choices='{SELECT c.client_name FROM clients c}'
            keyMap='{client_name}'
            textMap='{client_name}'/>
        </cell>
        <cell>
          <dropdown id='loadFilter'
            choices='{SELECT c.cargo_type FROM cargoTypes c}'
            keyMap='{cargo_type}'
            textMap='{cargo_type}' />
        </cell>
...
        <cell>
          <dropdown
            id='statusFilter'
            choices='{TABLE status ("Assigned";
                                    "Confirmed";
                                    "Loaded";
                                    "Completed";
                                    "Cancelled")}'
            keyMap='{status}'
            textMap='{status}'/>
        </cell>
...
To
add filtering to the mix, the code above uses the OR SQLite operator to
ignore the None selection in the drop-down lists, and the
AND SQLite operator to combine four conditions into a single
WHERE clause. If the user selects an option in the
driverFilter, clientFilter, loadFilter,
and statusFilter drop-down lists, the taskList's query
result changes, and therefore different rows are displayed in the form.
Notice that the name column in the drivers reference
table has been pulled into taskList with the alias
driver. This is just for the sake of convenience: when the code
references the column in the leftmost cell of its row template, instead of the slightly
confusing text='{task.name}', you'll be binding the self-explanatory
text='{task.driver}' query statement.
Save, publish, and access the form, then filter away.
Figure 178. Your new, filterable deliveries list, with all the drop-downs pulled down for illustration
Putting a running total of table rows in the footer
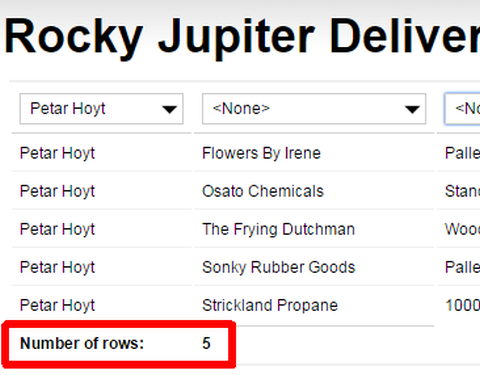
Now that the number of rows that is displayed can change significantly within a single form editing session, it makes sense to offer a counter that displays the number of rows that are displayed in real time. A perfect spot for such info would be in the footer, agreed?
You've inserted a header without a hitch, so a footer shouldn't be too much trouble either.
A
footer is pretty much like a header, really. The part
that's interesting about the code above is the TOSTRING function,
and why you need it here: the text property requires a string value, and
the COUNT function returns an integer (see it in use in a later version of this webform).
Save, publish, and view online. When the form loads, check the number of rows displayed in the footer, and then run a filter on the delivery entries to see the counter change.
Moving parts of the list into popups
Just like with mobile forms, you can move parts of a table control behind a link to a second screen. To save space, to help the user focus on the important bits of data, or simply to generate clicks on the page.
The assignments reference table fortunately does not have a zillion
columns that stretch on and on, but that comments column on the right could
use a bit of chopping, especially since it's mostly empty. (Let's not dwell on why when
there is a comment there, it's a bunch of lorem ipsum gibberish - strange people,
these Rocky Jupiter admins.)
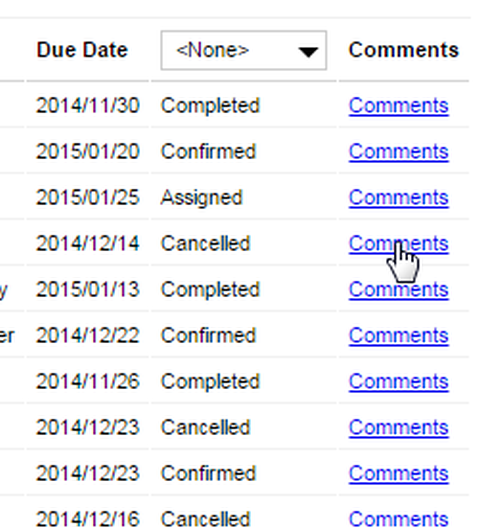
Let's go ahead and put the comments column that the
taskList query returns behind a
hyperlink.
Save, publish, view. Granted, this move did not really save you too much space, but you can surely sense the possibilities in the popup.
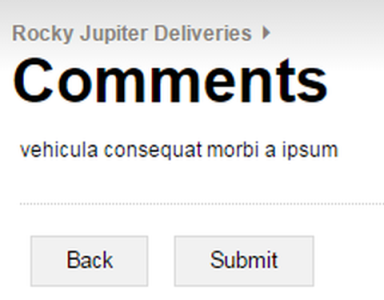
When you click the popup link, it opens in the same window and tab, and a breadcrumb
navigation trail appears above the title. Click the Back button to go
back to the form main page.
Another inconvenience is that where the
comments column is empty, you still have to click through to see the
empty screen. You'll change that before you're done, though. Patience.
Right. Your job seems more or less
done with the taskList table control as far as listing the deliveries goes.
Bring on the editing functionality!


