You have successfully asked your fictional truck driver user to check four parts of his or her truck, and report back on their condition using the form. Trucks, however, have many more parts, all with potential problems. If you include a segmented control for each of them, you quickly run out of screen real estate even on a large-screen mobile phone. Even with ten or so segmented controls, the user has to scroll, and the form looks crowded.
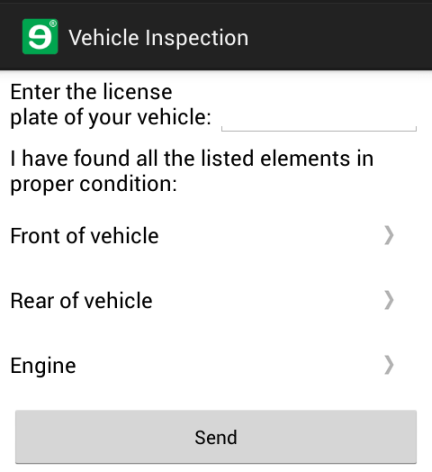
The mobile form language offers the popup panel as an alternative to overcrowding the form - it includes a link that opens in a new screen when the user taps the panel. Each popup panel you include in a form effectively gives you another screen to fit your form content on.
-
Open
vehicleInspection.form.xmlfrom the previous section. Wrap the four segmented controls in the form inside the followingpopupcontrolStudy notes: a popup panel in the mobile form language requires the
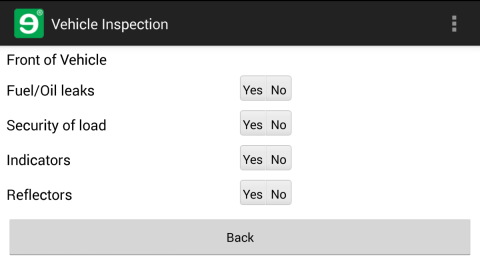
navigation="popup"attribute. This makes sure that instead of displaying its contents inline, the panel will render with a link that points to its child controls. When the user taps the link, the form displays the contents of the popup panel on a new screen. -
Publish the form, and enjoy your very own popup panel on your phone. Nice job.
-
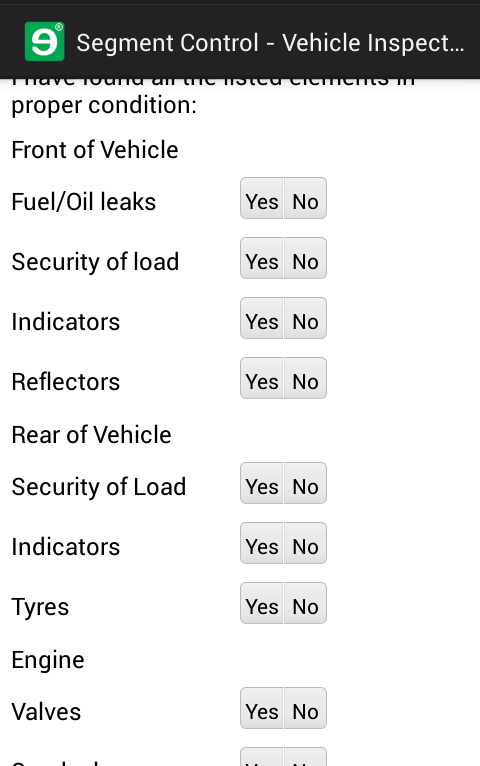
Let's take this a step further: check out the screenshots of the finished form with not one, but three popup forms and their contents. Below the Front of Vehicle popup, add the
The code and screenshot of the Engine popup is included for reference, but it's much less work to download the form from the link below.
... <Control type="panel" name="popupEngine" navigation="popup" label="Engine"> <Control type="label" name="engineLabel" text="Engine"/> <Control type="combobox" name="valves" choice="button" label="Valves" reference="SELECT 'Yes' UNION ALL SELECT 'No'"> <Validators> <Validator type="RequiredValidator" verifyat="submit" changeindicator="both" message="Please indicate if the listed part is in order."/> </Validators> </Control> <Control type="combobox" name="spark_plug" choice="button" label="Spark plugs" reference="SELECT 'Yes' UNION ALL SELECT 'No'"> <Validators> <Validator type="RequiredValidator" verifyat="submit" changeindicator="both" message="Please indicate if the listed part is in order."/> </Validators> </Control> <Control type="combobox" name="fan" choice="button" label="Fan" reference="SELECT 'Yes' UNION ALL SELECT 'No'"> <Validators> <Validator type="RequiredValidator" verifyat="submit" changeindicator="both" message="Please indicate if the listed part is in order."/> </Validators> </Control> <Control type="combobox" name="carburetor" choice="button" label="Carburetor" reference="SELECT 'Yes' UNION ALL SELECT 'No'"> <Validators> <Validator type="RequiredValidator" verifyat="submit" changeindicator="both" message="Please indicate if the listed part is in order."/> </Validators> </Control> </Control> ...Very soon, you'll be able to generate all of these controls, or as many as you like, from a single form template: you'll only have to include a single popup panel with one segmented control inside. Such is the power of data binding.
-
Save the form and see what it looks like on your phone. You must be real proud of yourself, and with good reason. You are doing great, but the best part is still to come.