-
How to insert a variety of controls (text boxes, dropdowns, tables, panels, etc.) into a form,
-
How to move parts of the form into popups to tidy up the UI,
-
How to add validation to prevent a user from submitting a form without adding input on the required controls of the form
-
How to make elements of your form and their values dynamically dependent on user input and external reference documents.
This tutorial will walk you through the creation, publication, and data management of your very first Mobilengine mobile form. Mobilengine mobile forms are the user interface to the mobile workflow solution that you create. You send a mobile form to your users' mobile device because you want to display data to them and/or collect input from them and the services that run on their devices. The forms themselves do not process the data that the user submits with them.
This very first mobile form is the vehicle inspection form that drivers of the fictional Rocky Jupiter Transport Company must fill in and submit at the start of every working day; the company requires the drivers to inspect the trucks and report the problems they find before they start their rounds.
The finished form will have three main parts:
-
a dynamically updating list of available trucks - for the driver to select one
-
a list of the parts of the selected truck - so the driver can report and submit photos of any problems with the truck,
-
and a signature section - that also includes the geographical position of the driver and the time that he or she submits the form.
You can download all the solution artifacts that you'll be creating in this part of the tutorial right here.
This is what the form that you’ll be making will look like on the drivers' mobile devices.
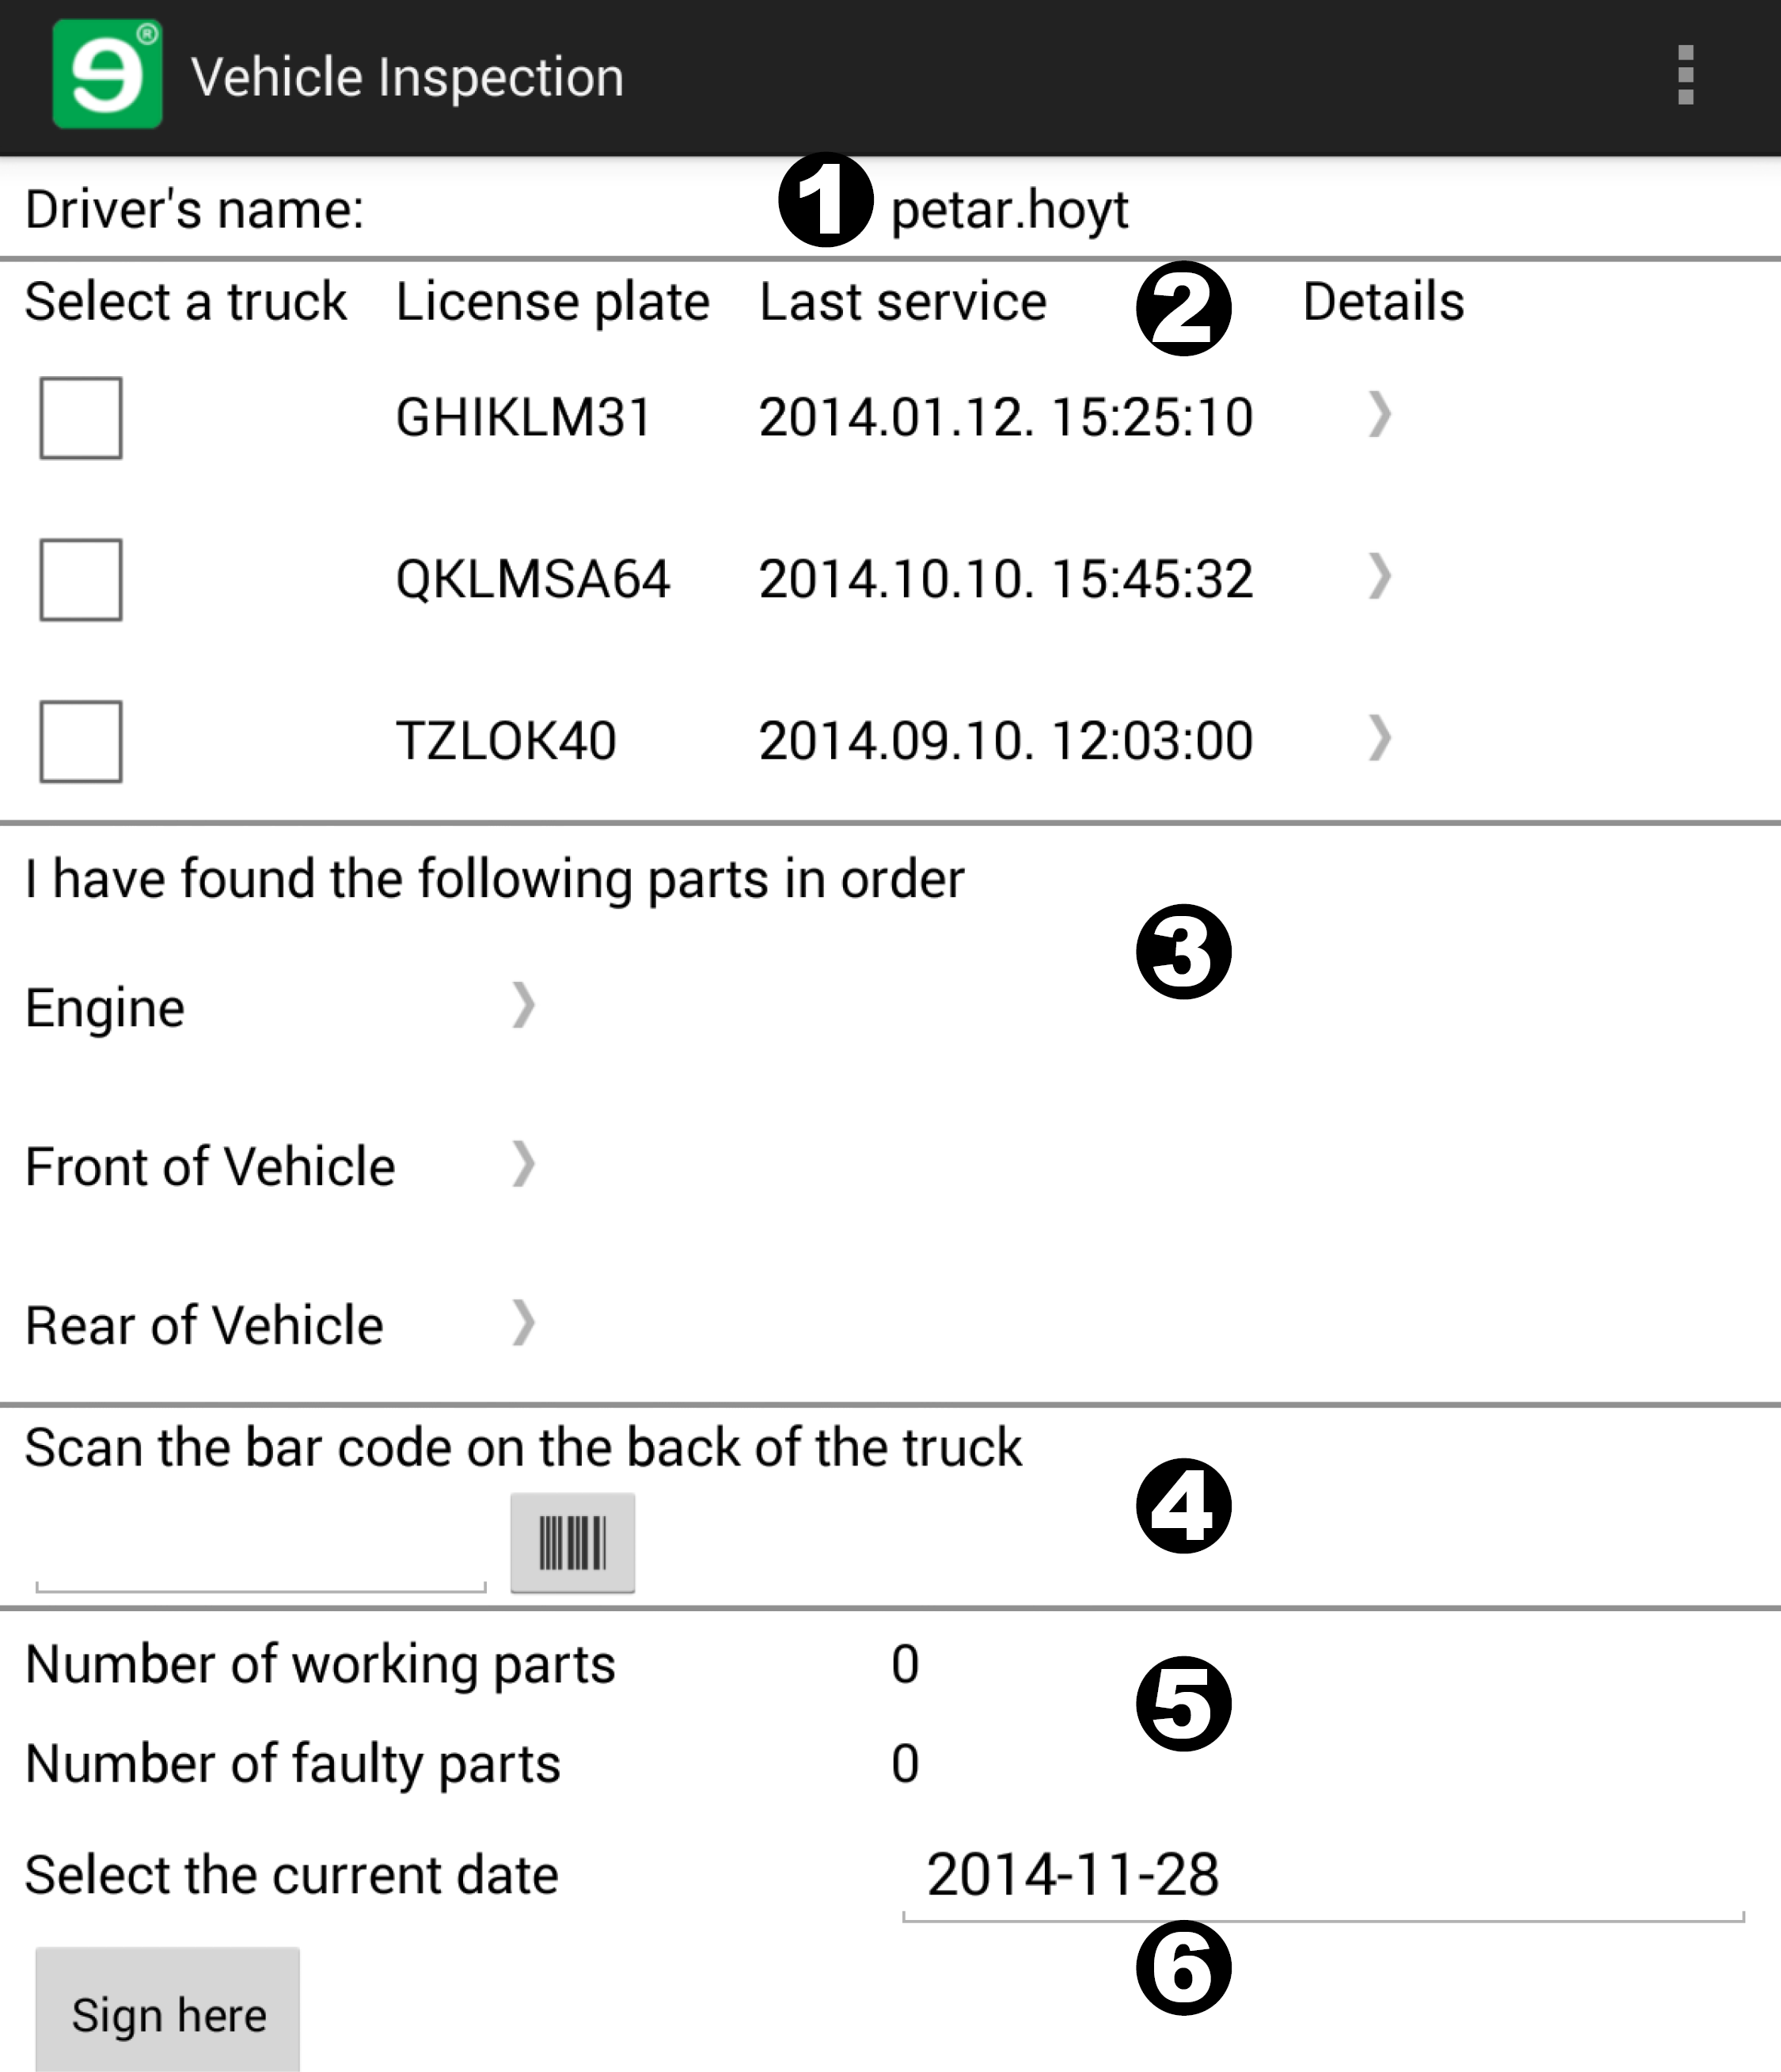
You'll call the driver by name (1). It's common courtesy.
The driver will have to pick a truck for the day from a list that you build for him or her out of up-to-date reference data (2).
The company wants the driver to check that the truck is OK before starting the day. You'll give them a list of all the important parts of the truck, grouped using popup panels for ease of use (3).
Rocky Jupiter have a bar code on each of their truck to identify them. The driver needs to scan it with the mobile device. (4)
For feedback, you'll include a dynamically updating count of the car parts that the driver marked OK and the car parts that were not OK (5).
Before he or she submits the form, the driver has to enter the date and sign the form, so you'll add a datepicker and a signature control (6).
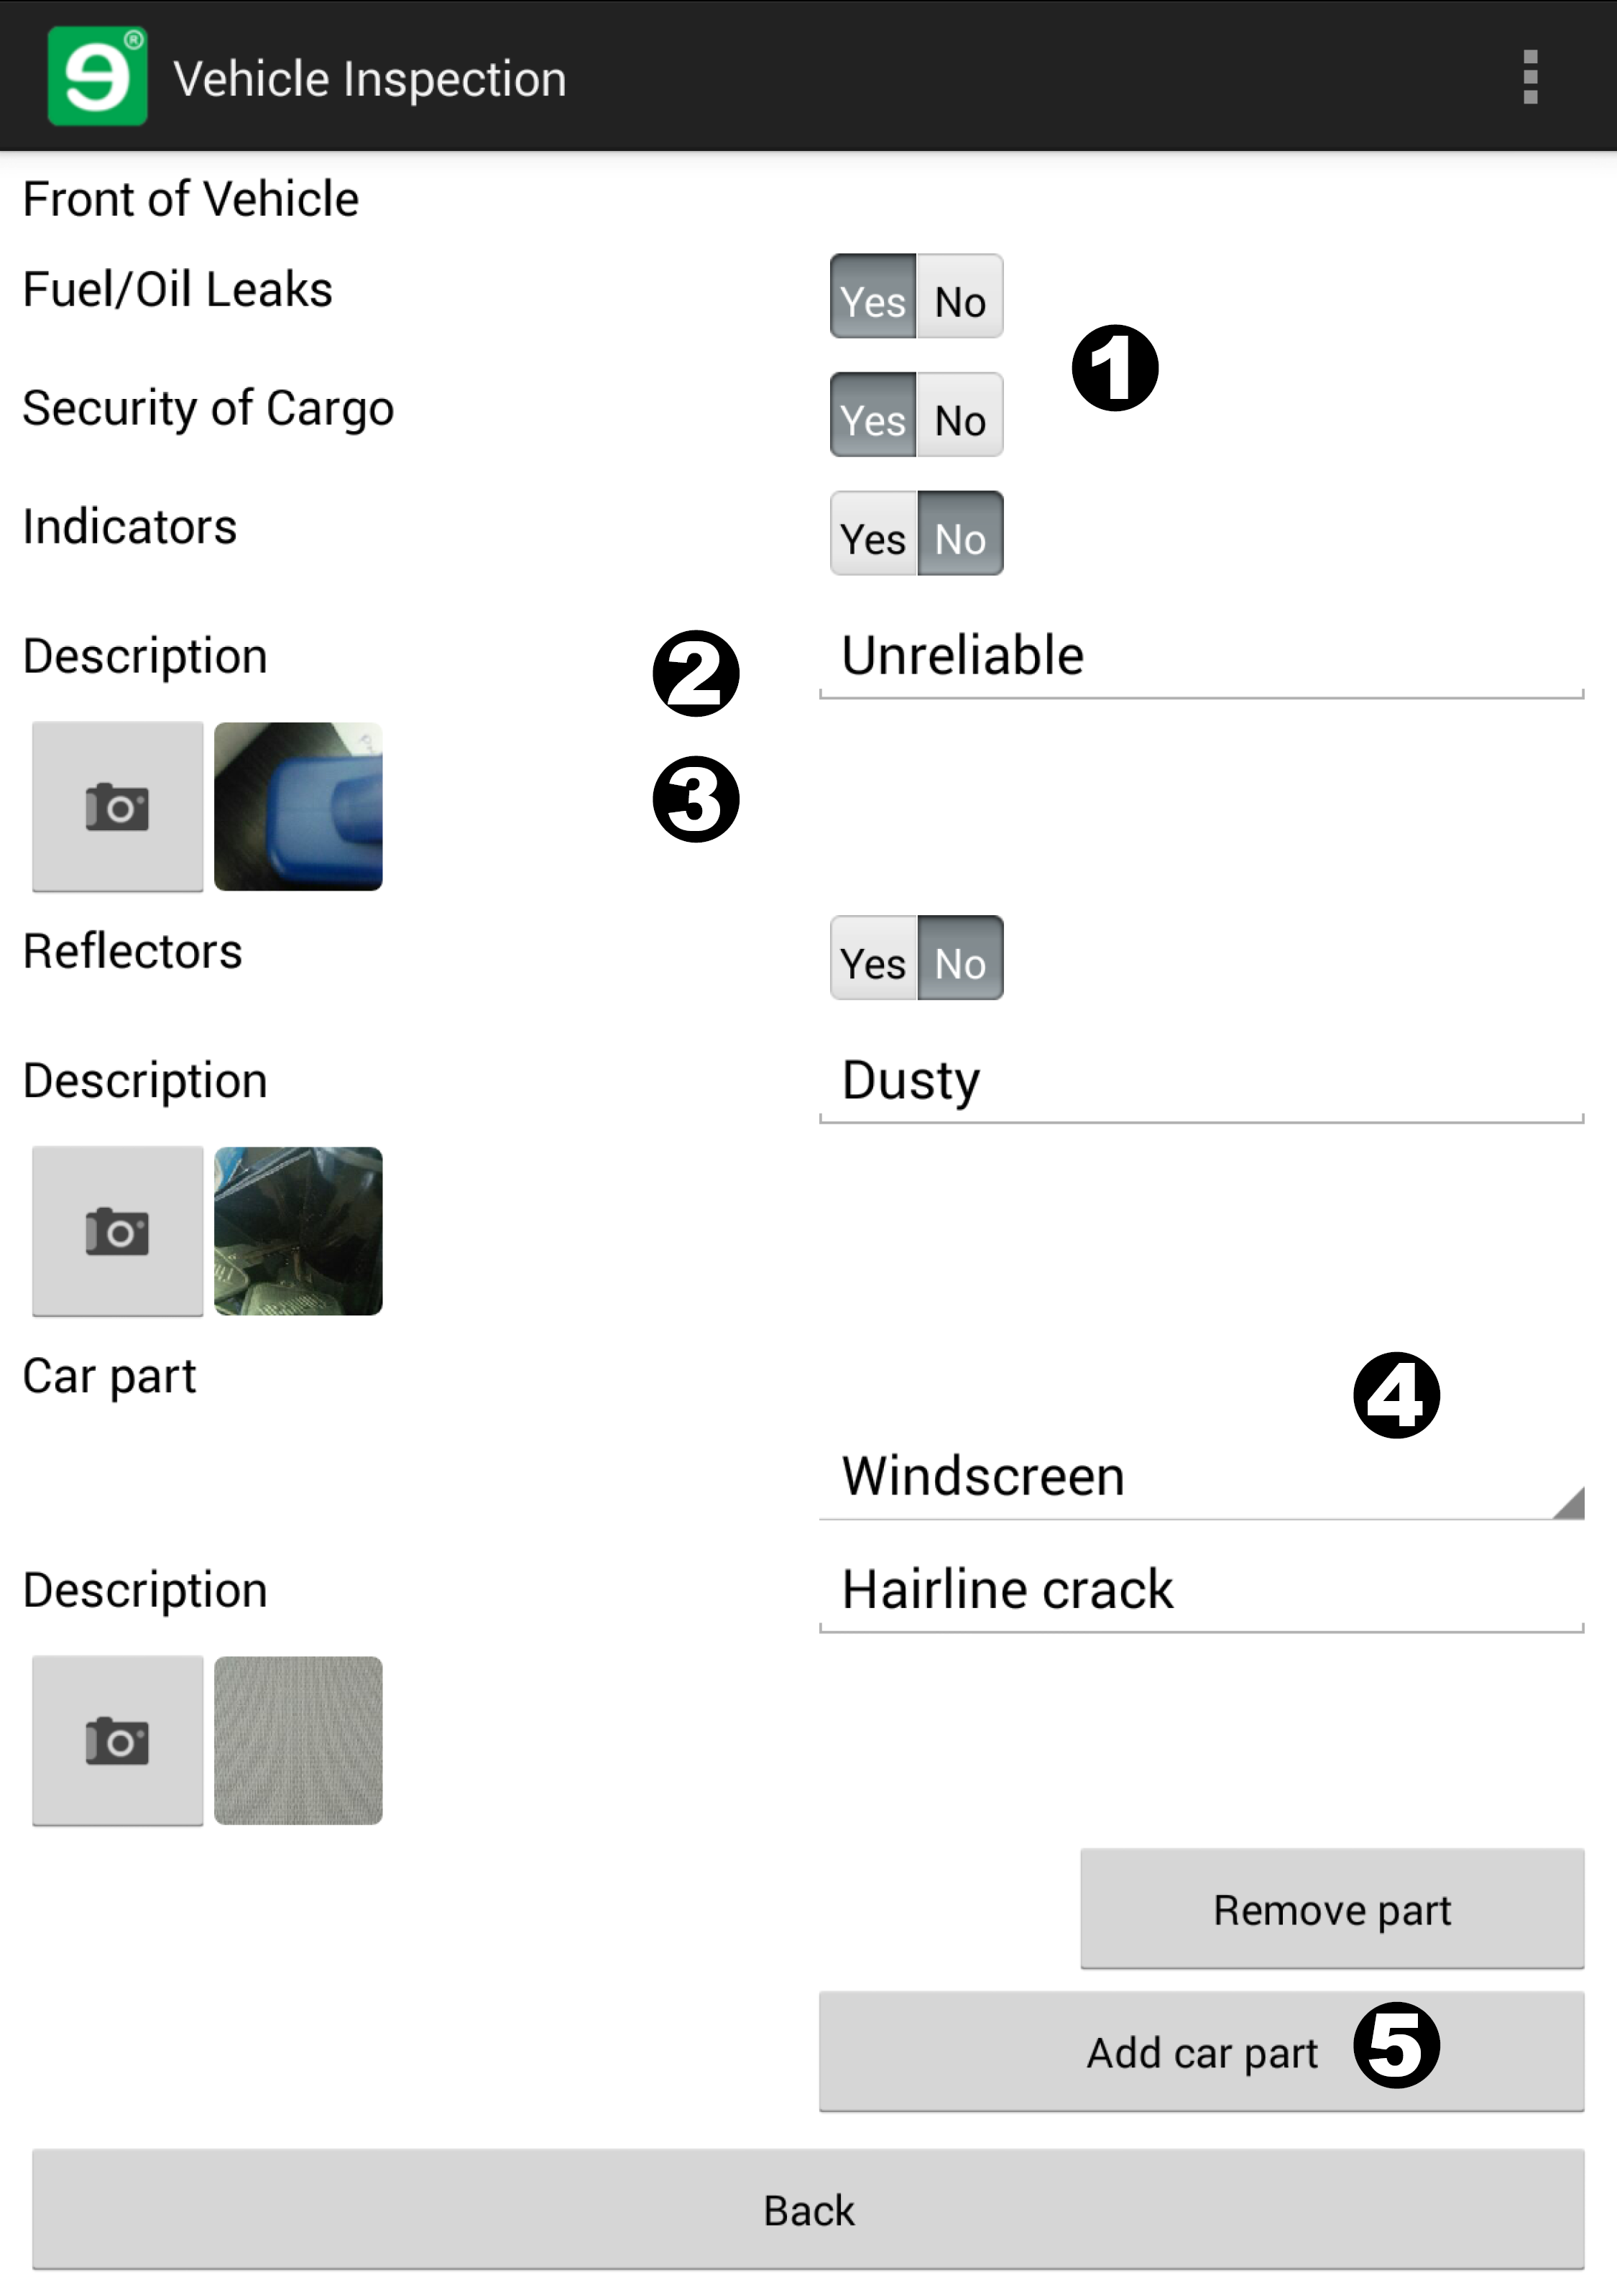
Inside the popup panels, the driver can select Yes if the part is OK, or No if there is a problem with the part (1). If he or she taps No, a text box (2) and a photo control (3) appear for details about the problem. The driver can also add Description text boxes and photo controls for extra car parts by tapping the Add car part button (5), and selecting a part from the drop-down list (4) that appears.

This is a standard Android datepicker control. The Today button (1) enters the current date. The Clear button (2) clears the date that was entered.
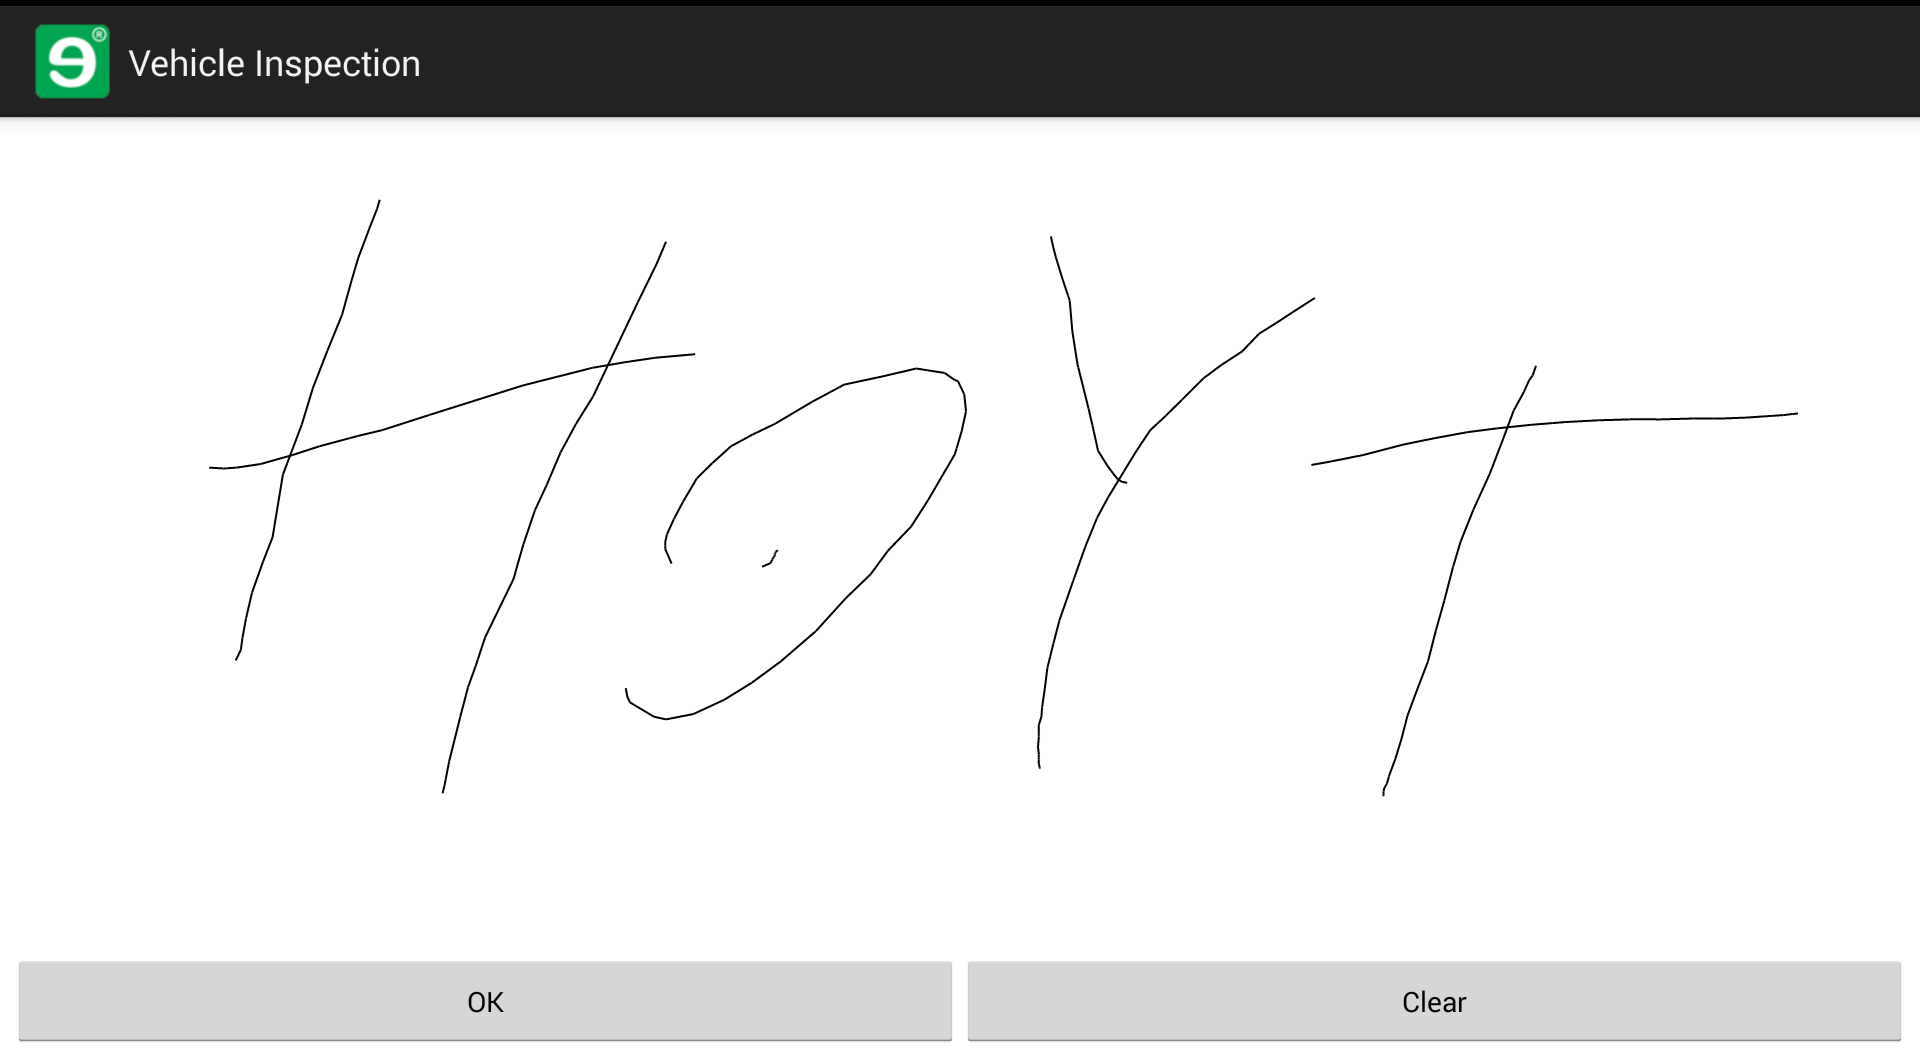
The signature control is a blank screen to draw on. When the user taps the OK button, the signature is saved as an image file.
Make sure that you have installed the Mobilengine developer environment, and let's begin.