If you just happened on this tutorial, and like the Mobilengine platform, but don't feel like working through all the tuts up to this point, here's a link to the solution artifacts created in the complex workflow tutorial. You'll find links to previous sections at the beginning of each section.
In the previous tutorial, you've created a fairly advanced workflow for Rocky Jupiter drivers. The forms and workflow scripts take a database table with all the active delivery tasks, filtered by the particular driver, then guide each driver through the steps to complete a delivery. Your workflow solution even updates the list of tasks as the drivers tick off their deliveries.
The forms you created were all mobile forms - truck drivers are constantly on the go, and for them, the most comfortable way to access the company database is through the Mobilengine application on the smartphones.
However, Rocky Jupiter, just like most companies, have office employees who need to access and submit the business data from their desktop computers - for example to add a new delivery task when a new purchase order comes in. Using the Mobilengine webform language, you can create workflow forms that live in the web browser instead of the mobile app, accessible to authenticated users on the webforms site, accessible, for example, via the Backoffice website.

In this introduction, you'll be building a webform for your desktop-based administrator users that lets them add a new task when a delivery order comes in, and assign the new task to a driver.
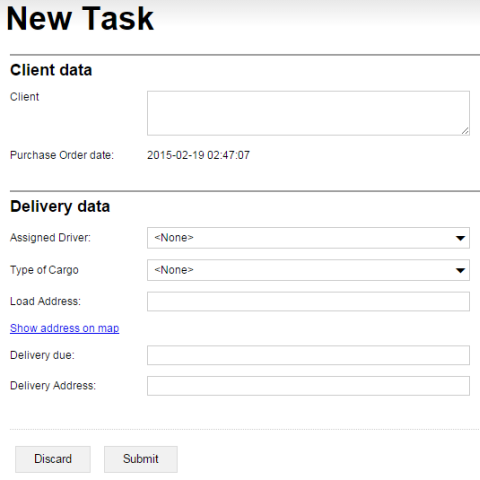
Figure 152. The finished New Task webform lets the user select and enter the basic details for a new delivery task, and then add it to the list of tasks
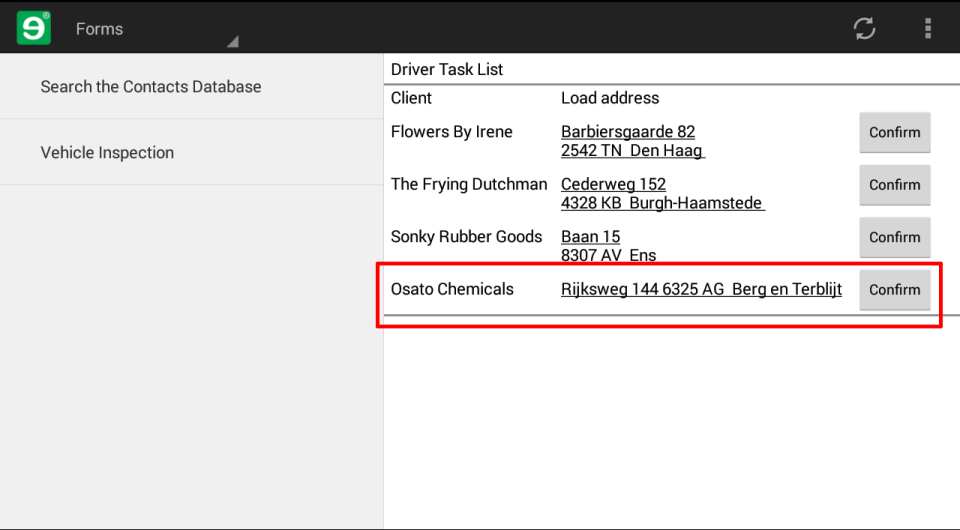
The delivery tasks that your users add using the New Task form
will show up in the dashboard forms on drivers' mobile devices.
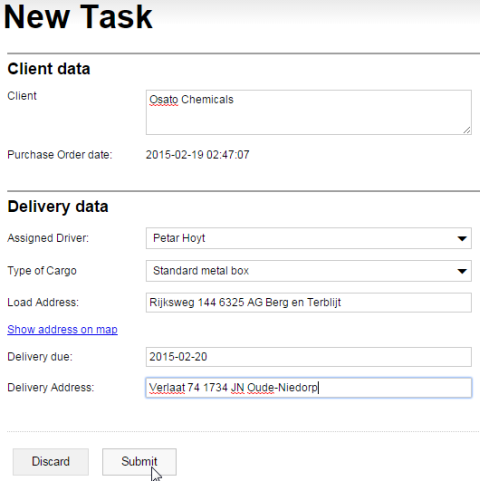
Figure 153. The final version of the webform, filled in with an order from Osato Chemicals, ready for submission
Whenever you fill in and submit a New Task webform, the
assignments reference table is updated, and the relevant driver is
notified about the new task.
Because the New Task webform can change the reference data, you'll also have to create a workflow script for it, but you don't need to be told that by now.