The Mobilengine mobile app is the primary user interface of the workflow solutions that you build. Installing it for yourself is the easiest way to test the functionality of your mobile forms.
The Mobilengine Build Tool (mebt) is the single most important part of the
Mobilengine SDK: without it, your solution artifacts you create would never add up to an
actual workflow solution that runs on mobile devices. The mebt is a command
line tool that you use to compile your solution artifacts, package reference data to them,
and publish them to the Mobilengine Cloud as complete workflow solutions. Through the
Mobilengine Cloud, your users' Mobilengine mobile apps can access the workflow solutions
that you assign to them.
Install the mobile app
After you sign up for a Mobilengine developer account, your Developer Dashboard will list
two ways to install the Mobilengine mobile workflow app on your Android device: you can
download the .apk-extension Android application package directly, or, if
the device you're installing on is able to receive text messages, you can send yourself a
text with a link to the same .apk file. If you don't have an Android
device, you'll need to use an Android smartphone emulator - there's a larger installation
overhead, but you won't have a problem trying out workflow solutions for yourself.
-
If you don't have an Android device, download and install the Android SDK, which includes a mobile device emulator. Read the guide and set up a virtual device.
-
Log in to your Developer Dashboard. If you'd like to download the application package directly, to a tablet without a SIM, or your emulator, use the device's browser to access the webpage.
-
If you're downloading the application package directly, tap or click the Apk link to start the download. When the download is finished, run the installer.
-
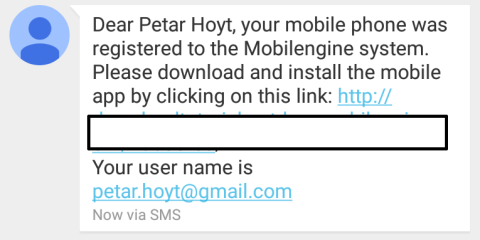
If you'd like to access the application package through a text message, click the Send install SMS link to send yourself a text message with a download link.Tap the link in the text message that you receive, and download the application package.
Figure 17. The text message that newly signed-up developers get. Take not of the username: the tutorials assume that this is the username that you'll be using throughout.
-
-
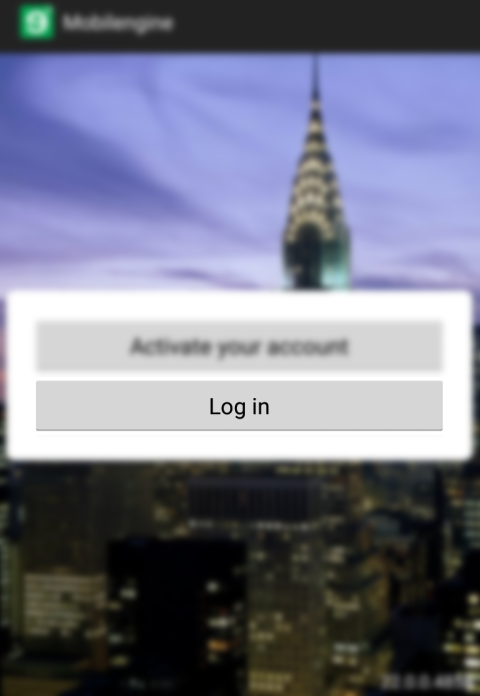
At the end of the app installation, review the app permissions, open the app, tap or click the Login button, and enter your authentication details to log in.
-
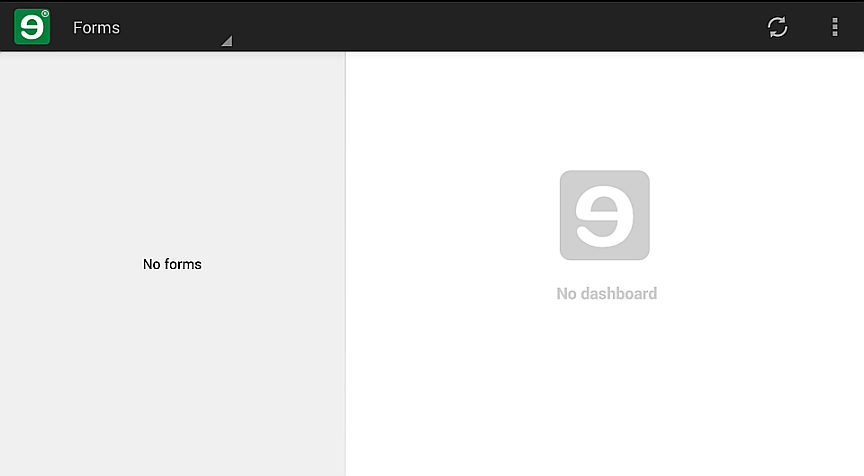
Success. It's a bit lonely, though, with the No forms message and the empty dashboard, wouldn't you say?
Go on and install the Mobilengine Build Tool (mebt) to start populating your mobile workflow app with mobile forms.
Depending on the settings of the device that you are installing the app on, you may need to modify your security settings to allow installing apps that don't come from the Google Play site.
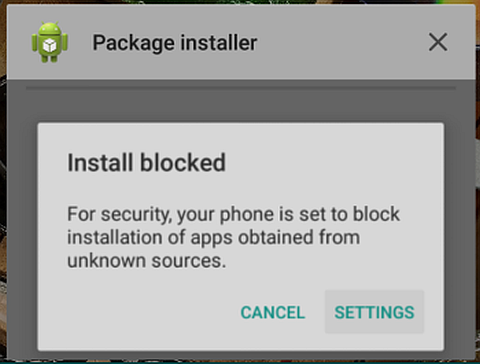
Figure 20. The Install blocked dialog that appears if only apps downloaded from Google Play are allowed
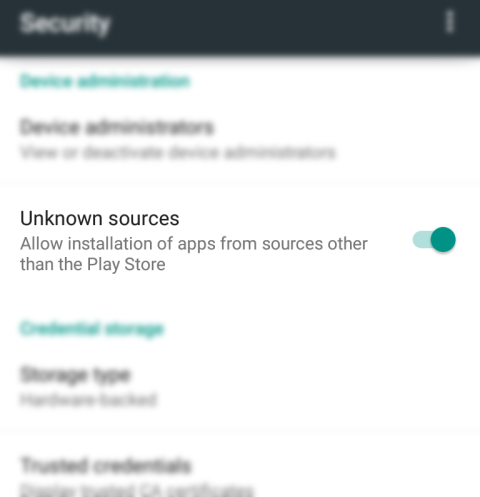
If your installation was blocked, go to Settings, and find and enable Unknown sources.
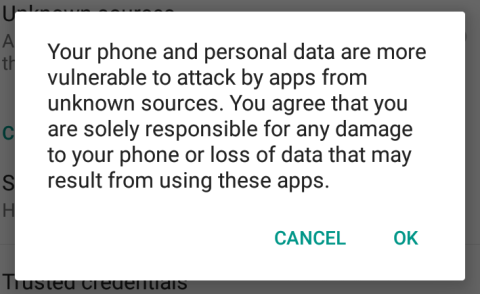
Tap OK in the Unknown sources dialog
to move on.
-
Log in to your Developer Dashboard, and click on the SDK deployment package link to download and run the installer file. The installer wizard will take care of everything for you.
-
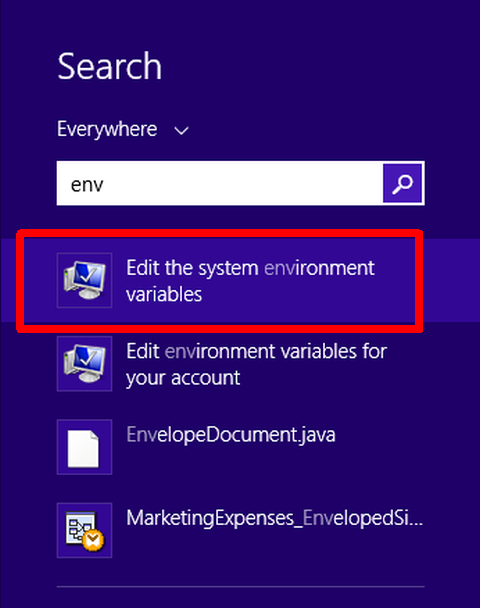
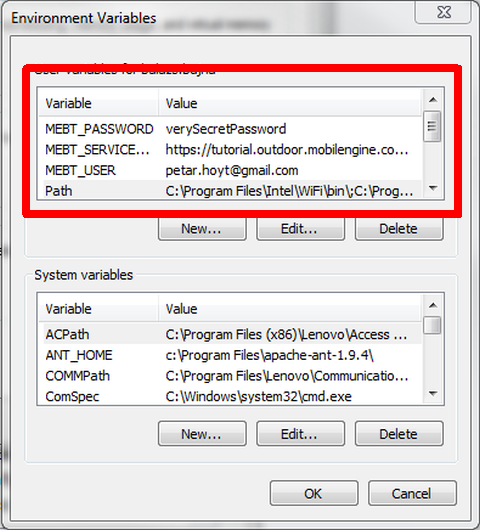
For ease of use, it is recommended to set up your
mebtpublishing options as environment variables on your machine:To add new environment variables in Windows 7, enter the Start menu, right-click Computer, and click through to → → .
When you've got the dialog, click New under the User variable for... panel, and enter the following variable names with their appropriate values:
-
MEBT_USER: [the email address line of your Mobilengine Developer account]
-
MEBT_PASSWORD: [the password of your Mobilengine Developer account]
-
MEBT_SERVICEURL: [The https-protocol URL of the Backoffice site]
For the URL, use the web address listed as Service URL on your Developer Dashboard. The URL in the screenshots below is an illustration and will not work for your specific instance.
When you've done all that, click OK to save your changes.
This might have seemed quite a lot of fuss, but you have in fact saved yourself tons of time: From now on, all you need to enter when you run the
mebttool is the command and the folder that you want to access.c:\RockyJupiter>
mebt run .mobilengine srv 22.0 (Release) v22.0.157.14908 Executing run (compile and deploy to server): Service url: https://tutorial.outdoor.mobilengine.com/comex/v1/ User: petar.hoyt@gmail.com adding 'vehicleInspection.form.xml' Reset integration settings No changes for form 'vehicleInspection' Done.You might be wondering what on earth
c:\RockyJupiter>is meant to be at the top of the screenshot: it's the name of the fictional transport company this series of tutorials uses as an example.Petar Hoyt, the user named in the screenshot is also just a placeholder name, and not a real person at all. -
Integrate solution artifact creation and publication
If you are using Notepad++ to code your mobile forms, you can use a plugin called NppExec
to run pre-written batch files from inside the editor. You can exploit the plugin's
functionality to make Notepad++ run the mebt tool on the folder of the
solution artifact file that is currently open, with a single keyboard shortcut of your
choosing. How awesome is that?
-
Save the following batch file as
mebtRun.batin themebtfolder (most probablyC:\Program Files\mebt, but do double-check):The batch file as it is written above requires a
reftab.xlsxfile to be present inside the folder that you are compiling and publishing. In order for this little piece of magic to work, you will always need to make sure that there is a reference table inside your solution artifacts folder, and that it's namedreftab.xlsx. -
Download and install the NppExec plugin, and then set it up to run
mebtRun.batwith a keyboard shortcut:In Notepad++, select the → → option.
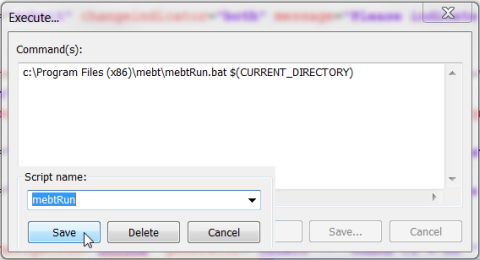
Select → → , type
C:\Program Files\mebt\mebtRun.bat $(CURRENT_DIRECTORY) into the Command text box, entermebtRunas the script name, and click Save.Figure 24. Notepad++'s → → dialog with the Command(s): text box and the Script name: drop-down showing your input
-
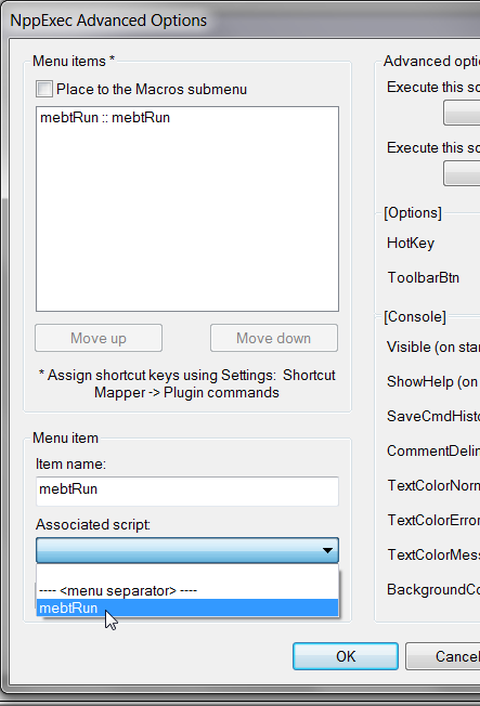
Select → → : type
mebtRuninto the Item name text box, choose mebtRun in the Associated script drop-down, and clickAdd, then OK.
-
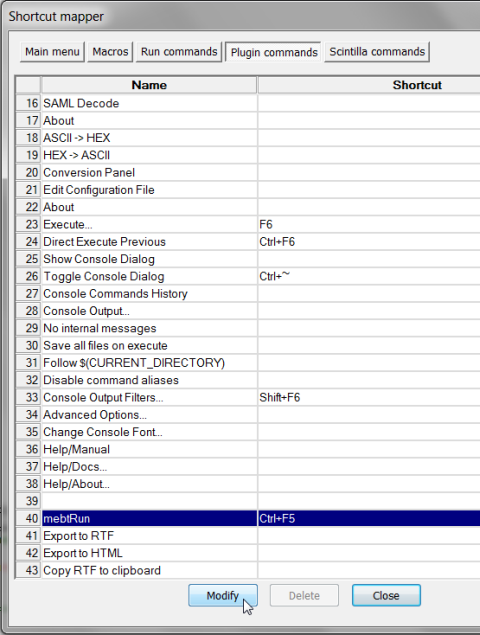
Select → → , find mebtRun in the list, click the Modify button at the bottom of the dialog, set the shortcut for the script, and click OK.
-
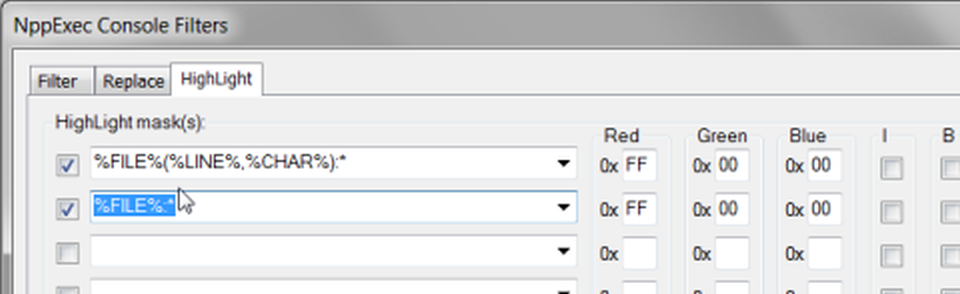
Select → → → , enable two lines, and set their masks and colors according to the screenshot below.
These settings make sure that the console that Notepad++ opens to run
mebtwill indicate any errors thatmebtencounters in unmistakable red. What's more, if you double-click on a red bit, the file will open and the cursor will blink at the exact spot with the error. You are free to change any of these settings to your own preferences, of course. -
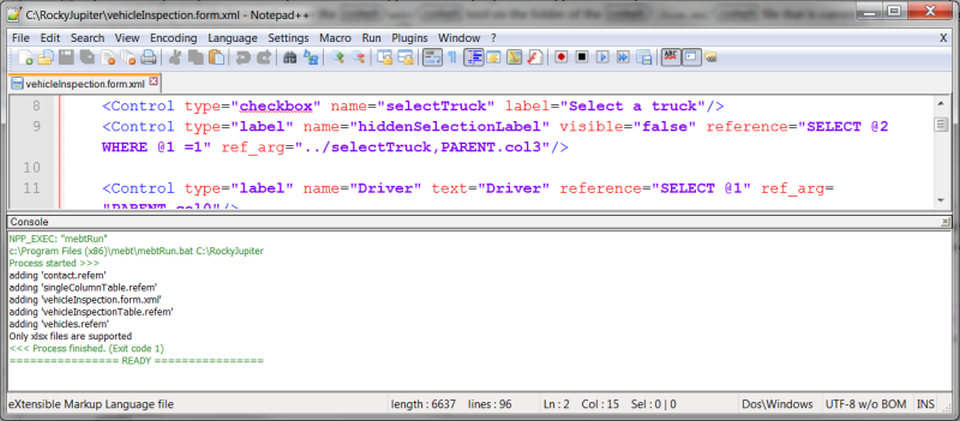
You're all set: from now on, whenever you press
Ctrl+F5in Notepad++, a console window withmebt.exerunning inside it will appear at the bottom of your screen, and the folder that your current file is in will be compiled and published to the cloud.Figure 28. This is what you'll see when you press
Ctrl+F5(or your custom associated keyboard shortcut) while an artifact solution file is open in Notepad++