'Why exactly was this lengthy digression necessary?', you might ask. Well, because you want to let your users select the drivers in the form from a list instead of having to type their names in. The drop-down list control needs choices that can only come from data-binding. The concept is not trivial, and it's essential to webforms (as well as mobile forms), so you really can't learn about it enough.
Now that you've seen how a drop-down list works, it's time to get your feet wet actually
making one. Replace the driver text box in your form with a drop-down
control.
Since you'd like to bind columns of a reference table into the driver
control, you need a reference table declaration, and an input file with reference data.
Fortunately, you don't need to make either one of these from scratch. You've used the exact
same drivers reference table before: download its declaration and input table, and save them in the
webforms folder.
When you've taken care of the reference table, it's time to get down to business with the form itself:
<form id='newTask' menuName='New Task' platforms='web' xmlns='http://schemas.mobilengine.com/fls/v1'><dropdown id='driver' label='Assigned Driver:' choices='{SELECT u.userid, u.name FROM drivers u}' keyMap='{userid}' textMap='{name}' width='30 em'/><textbox id='client' label='Client' lines='3' width='30 em'/> <datepicker id='POdate' label='Purchase Order date:' dateFormat='(dtf yyyy "-" MM "-" dd)' width='30 em'/> <datepicker id='dueDate' label='Delivery due:' dateFormat='(dtf yyyy "-" MM "-" dd)' width='30 em'/> </form>
As
you would expect based on what you know about drop-down lists in webforms, the choices,
keyMap, and textMap attributes are in the
driver drop-down's driver's seat.
The query in choices is basically an SQLite SELECT statement, and returns
both columns of the drivers reference table. Note the alias
u used both after the SELECT and the
FROM operators. When you query a reference table or a column in a table
expression, or when you query any other table value in general, the webforms language
requires a table alias.
The keyMap attribute determines that the rows in the query result can be
uniquely identified by their userid field.
The textMap attribute specifies that the name fields of
the query result rows will be displayed as choices in the drop-down control.
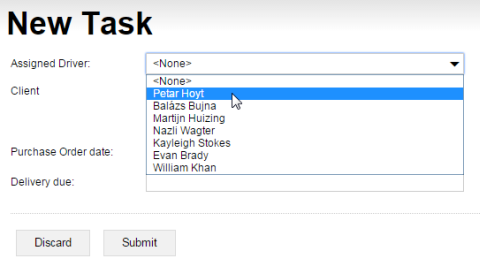
Save and publish the new form. Don't forget to include the input table for the
drivers reference table when you publish through the mebt. Navigate to the webforms site or refresh the browser if
it's already open, and check out your shiny new drop-down list.
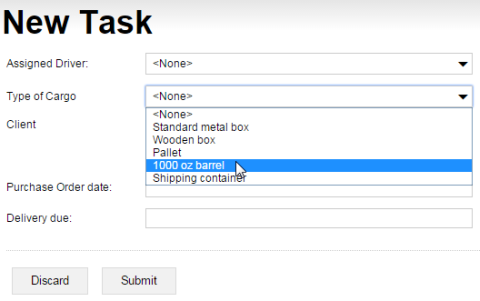
While you're in the drop-down mindset, insert a second one right below the first. This
one will let the admin pick the type of packaging for the cargo from the list of containers
in the cargoTypes reference table.
Ready?
Since
the cargoTypes reference table has only one column, there is no
head-scratching about the name of the column that you put into the
choices query statement, the keyMap, or the
textMap attributes of the loadType dropdown.
Save the form, make sure that you include a worksheet for cargoTypes in
the Excel file that you reference in the command line, and publish.
The webform in its present state is still not functional, but you're making sure that when it gets going, it's going to be a real pro.
In the next section, you'll add another data-entry element, and access a system parameter to make your form even sexier.