What you'll be learning:
-
How to put checkbox controls into your forms (such as the one below).
-
How to make mobile forms take advantage of the built-in camera with photo controls like the one below.
Figure 43. A photo control with three photos already taken. Tap the camera icon to start your mobile device's built-in camera app and take more.
-
How to put popup controls that contain other controls into your form.
The form that you will have created when you're done with this section will feature about thirty checkboxes, each corresponding to a part of a Rocky Jupiter truck, organized into popups that open on a new screen when tapped.
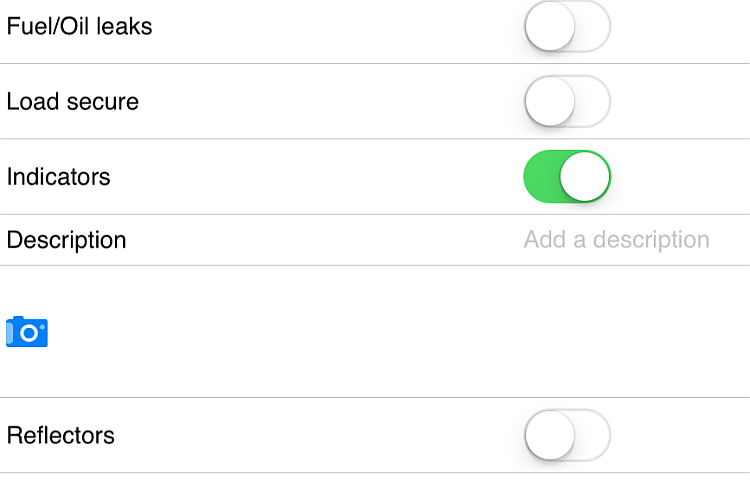
Inside the popups, you'll put a checkbox for each car part. If the driver toggles one, indicating a problem, a text box and a photo control appears, asking for the details of the issue.
(You're right, it's a bit(?) confusing to have a toggle control in the 'Yes' position indicate a problem in the form. Bear with us; you'll change that before you get this solution production-ready.)
Checkbox
Open vehicleInspection.fls.xml from the previous part of the tutorial. Below the
textbox control, add two explanatory textview and a
checkbox controls, and save the
file.
A
textview is essentially an info label: it displays read-only
text to the user. A checkbox is a standard iOS binary toggle: you can set its
starting selection state, and when the user taps it, it switches to its other
available state.
Why not publish the new form and check up on yourself before you add some more content? Do you still remember how to do that?
c:\RockyJupiter>mebt run .
mobilengine srv 28.0 (Release) v28.0.38.19272
Executing run (compile and deploy to server):
Service url: https://tutorial.mobilengine.com/services/comex/v1/
User: petar.hoyt@mailinator.com adding 'vehicleInspection.form.xml'
Reset integration settings
Import form 'vehicleInspection'
Done.
After you publish, synchronize your device, and open the form.
OK, that went well. Trouble is, the specs say there's 10 further car parts that need to be included for this pilot project (and 16 more down the line, as you'll see). If you just start stacking checkboxes in a form, your poor user will give up scrolling long before he or she is done.
You need to break up the wall of checkboxes into manageable chunks. This is
where popup controls come in.
Popup
A popup is an
alternative to overcrowding the form. You can fill it up with other controls, which
will not appear until the user wants to see them. Each popup you include in a form
effectively gives you extra screen real estate to fit your content on without the
user having to scroll.
Let's go ahead and hide all those checkboxes from the screenshot above inside popups, then.
<form id='vehicleInspection' ...>
...
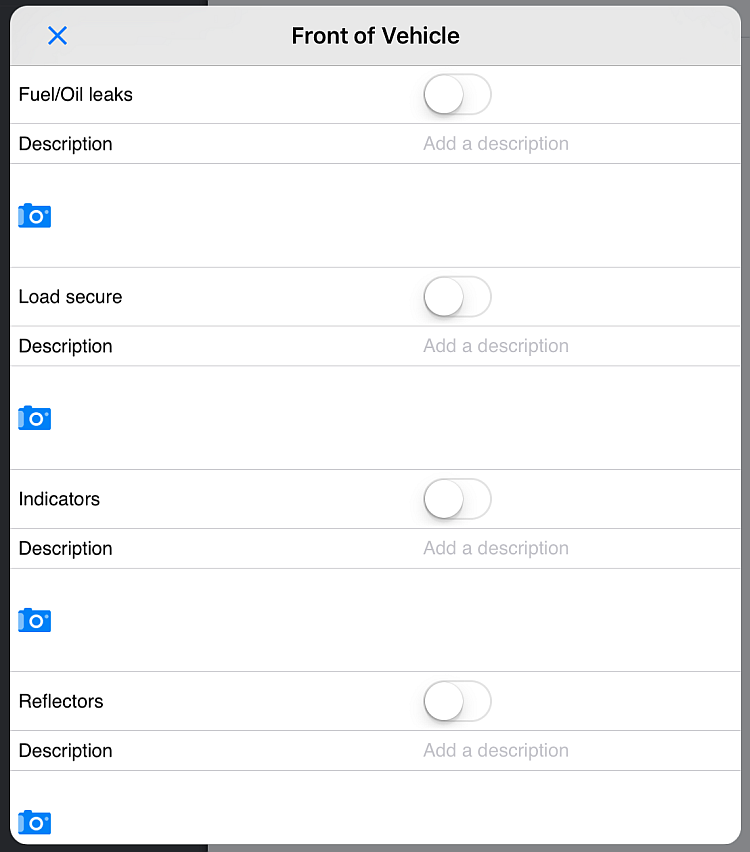
    <popup title="Front of Vehicle">
        <checkbox id='leaks' label='Fuel/Oil leaks'/>
        <checkbox id="Fsecurity" label="Load secure"/>
        <checkbox id="Findicators" label="Indicators"/>
        <checkbox id="Freflectors" label="Reflectors"/>
    </popup>
    <popup title="Rear of Vehicle">
        <checkbox id="Rsecurity" label="Load secure"/>
        <checkbox id="Rindicators" label="Indicators"/>
        <checkbox id="Rtires" label="Tires"/>
    </popup>
    <popup title="Engine">
        <checkbox id="Evalves" label="Valves"/>
        <checkbox id="Esparkplugs" label="Spark plugs"/>
        <checkbox id="Efan" label="Fan"/>
        <checkbox id="Ecarburetor" label="Carburetor"/>
    </popup>
</form>
No
need for the textview controls telling the user which region of the
vehicle the checkboxes relate to - this has been moved into the
popups' title.
There's a pretty nifty openMode property for popups you'll get to
know later. It determines whether the popup opens full-screen, in a lightbox-style
dialog, or in a tooltip-style bubble. The
default is the full-screen type you'll see in this section.
Publish the form like before, and have a look on your mobile device.
Figure 49. Popups open a second screen, and feature a 'Back' arrow to get back to the original screen
The look and feel of the form might have been streamlined with these popups, but you still have to type up every single checkbox one by one. Don't worry, though, Mobilengine's got you covered. Very soon, you'll be able to generate all that you can see in the screenshot above, and more, based on a template.
So far, so good. However, simply submitting that there's something up with the carburetor or the indicator isn't very helpful for Rocky Jupiter. They'd like more detail about malfunctioning company equipment: a few words to explain the problem and maybe a photo to document it would be nice. Time to get back to that form.
Adding a photo control
Putting a textbox control below each of the
checkboxes seems straightforward enough; it's the
photo control that seems tricky. But only until you check
out the code sample
below.
All
it takes is entering photo inside angle brackets, really. Even
the id is included only so that the photos that the user takes
will be submitted to the Mobilengine Cloud with the form. Let's try it out right
now: publish and open the form, and snap a few photos.
Tap Submit and log in to your Mobilengine
Backoffice server (at the URL listed as backoffice on
your Developer Dashboard).
On the Incoming data>Raw data tab, click the Show button, and check that the table on the right lists 3 images in the Photo column.
If you click on the image tally link, a gallery opens.
It's all well and good that your users can now take photos and submit them
to the Cloud, but you're back to square one as far as user experience is
concerned. It's just as crowded inside your popup dialogs as it used to be
outside of them.
Besides, the textbox and the photo are
unnecessary as long as there is no problem to report using them. By rights, they
should both appear only if the user selects the checkbox above
them. There's your next challenge.
Making the new controls conditional
With the if element, you can make any control or group of controls
appear in your form only if a certain condition is met. In the sample below, the
two potentially unnecessary controls are wrapped in an if with
a condition that makes them only show up if the
checkbox above them is selected. Let's see how this
works.
Publish
and watch how the two controls only show up if the checkbox
above them is selected. Neat, right?
If you're wondering what {leaks.checked} means, you're on
the right track. It's a data-binding expression that references the selection
state of the control named leaks.
Data-binding is the single most powerful concept in the Mobilengine universe: read the next section to find out everything about it.


