What you'll be learning
If you're wondering why this tutorial is so short, it's because all it's telling you about is a single attribute.
It's true! All you need to do to make your mobile workflow solution forms run in the
browser (or vice versa!) is modify the platforms field on the form
root element to suit your needs. No filler, just killer!
Put a Mobilengine in your browser
In a previous section, you've created a fairly advanced workflow for Rocky Jupiter drivers. The forms and workflow scripts take a database table with all the active delivery tasks, filtered by the particular driver, then guide each driver through the steps to complete a delivery. Your workflow solution even updates the list of tasks as the drivers tick off their deliveries.
The forms you created were all mobile forms - truck drivers are constantly on the go, and for them, the most comfortable way to access the company database is through the Mobilengine application on the smartphones.
However, Rocky Jupiter, just like most companies, have office employees who need to access and submit the business data from their desktop computers - for example to add a new delivery task when a new purchase order comes in.
The Mobilengine language also lets you create workflow forms that live in the web browser instead of the mobile app. There are but negligible differences in the mobile-based and browser-based implementations, and you can even have forms that are available both on a mobile device and online.
Browser-based workflow forms are available for authenticated users on the webforms site that is accessible via your Developer Dashboard or the Backoffice website.
Add new tasks online
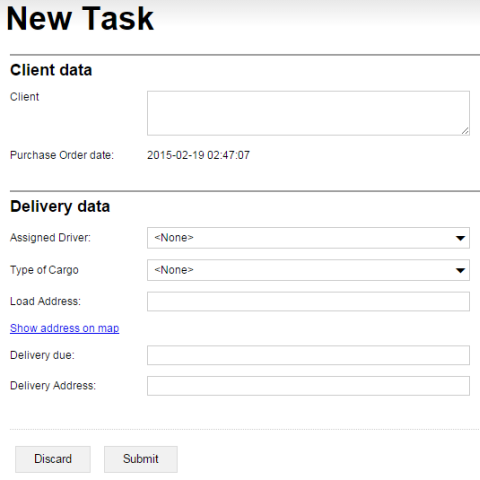
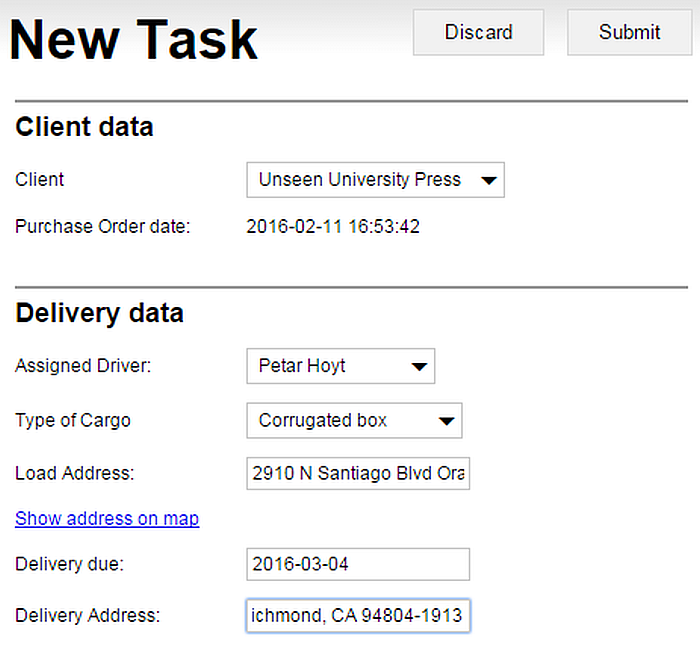
You'll be building a webform that integrates with the mobile-based delivery task workflow from earlier, that lets administrator users add a new task when a delivery order comes in, and assign the new task to a driver:
Figure 152. The finished New Task webform lets the user select and enter the basic details for a new delivery task, and then add it to the list of tasks
The form will impact the mobile workflow that you've set up earlier, as thanks
to their dashboard forms, drivers will be notified in real time about new tasks
having recently been assigned to them.
The reference data
One might argue the point that the reference data is the most interesting aspect of the whole webform tutorial, given that there are four reference tables instead of one. Goes to show how routine this section is, by the way.
The table declaration files themselves aren't too exciting. In
fact, you will already be familiar with assignments from the
solution that you've
published:
<Reftab Name="assignments"
    xmlns="http://schemas.mobilengine.com/reftab/v1"
    Push="true"
    Notify="true">
    <Columns>
        <Column Name="usr"
            Type="Text" AgentName="true"></Column>
        <Column Name="assignment_id"
            Type="Text" NotNull="true"></Column>
        <Column Name="client"
            Type="Text" NotNull="true"></Column>
        <Column Name="load_type"
            Type="Text" NotNull="true"></Column>
        <Column Name="load_address"
            Type="Text" NotNull="true"></Column>
        <Column Name="load_date"
            Type="Date"></Column>
        <Column Name="due_date"
            Type="Date" NotNull="true"></Column>
        <Column Name="unload_date"
            Type="Date"></Column>
        <Column Name="unload_address"
            Type="Text" NotNull="true"></Column>
        <Column Name="comments"
            Type="Text"></Column>
        <Column Name="photo_load"
            Type="Text"></Column>
        <Column Name="photo_unload"
            Type="Text"></Column>
        <Column Name="status" Type="Text"
            NotNull="true"></Column>
    </Columns>
</Reftab>
Crucially,
though, this one has a new column, due_date. You'll be handling
the discrepancy between the old and this revised declaration file for the same
reference table in due course. For now, just make sure that you don't use the declaration
file with the same name from before.
As for the other three, they're even blander: one- or two-column affairs that all
take string values. The only reason for their existence is to populate
dropdown controls so that the administrator doesn't wreck
the workflow by misspelling something in the browser input field.
There's one that lists all the available cargo container types:
One that does the same to the clients Rocky Jupiter delivers for:
And a third one for all the driver employees waiting to be assigned new tasks to:
And here's the input data spreadsheet with valid input for each of these reference tables, on separate worksheets.
The reason that these little tables are separate is that independent departments within the company might be populating, updating, and managing them, and your delivery-adding form always needs to have the latest version of this data.
Save the declaration files and the spreadsheet in a new solution folder, and let's move on to the form itself without too much ado.
The form
Apart from the platforms='web' attribute, there is honestly
nothing in this form you haven't seen before. Well, perhaps the chapter
wrapper control that puts a nice big header over a group of controls. Anyways,
this form isn't much more than practice for such a seasoned form-coding veteran
such as yourself, but do have a
look.
<form id='newTask'
    menuName='New Task'
    platforms='web'
    xmlns='http://schemas.mobilengine.com/fls/v2'>
    <chapter title='Client data'>
        <dropdown id='client'
            label='Client'
            choices='{SELECT c.client_name FROM clients c}'
            keyMap='{client_name}'
            textMap='{client_name}'>
            <validation>
                <validator cond='{selectedText is not null}'
                    message="Required field"/>
            </validation>
        </dropdown>
        <textview id='POdate'
            label='Purchase Order date:'
            text='{FORMATDTL(sysp.dtlFormOpen,
                    (dtf yyyy "-" MM "-" dd" "HH":"mm":"ss))}'/>
    </chapter>
    <chapter id='deliveryData'>
        title='Delivery data'>
        <dropdown id='driver'
            label='Assigned Driver:'
            choices='{SELECT u.userid, u.name FROM drivers u}'
            keyMap='{userid}'
            textMap='{name}'/>
        <dropdown id='loadType'
            label='Type of Cargo'
            choices='{SELECT c.cargo_type FROM cargoTypes c}'
            keyMap='{cargo_type}'
            textMap='{cargo_type}'>
            <validation>
                <validator cond='{selectedText is not null}'
                    message="Required field"/>
            </validation>
        </dropdown>
        <textbox id='loadAddress' label='Load Address:'>
            <validation>
                <validator cond='{text != ""}'
                    message="Required field"/>
            </validation>
        </textbox>
        <linkview id='mapLink'
            text='Show address on map'
            url='{"https://www.google.com/maps/place/?q="
                    || loadAddress.text}'/>
        <datepicker id='dueDate'
            label='Delivery due:'
            dateFormat='(dtf yyyy "-" MM "-" dd)'>
            <validation>
                <validator cond='{date is not null}'
                    message="Required field"/>
                <validator cond='{date >= sysp.dtlFormOpen}'
                    message="Due date cannot be earlier than current date."/>
        </validation>
    </datepicker>
    <textbox id='unloadAddress'
        label='Delivery Address:'>
        <validation>
            <validator cond='{text != ""}'
                message="Required field"/>
        </validation>
    </textbox>
</chapter>
</form>
For
the sake of variety more than anything else, the mapping application used in
the linkview control (lines 42-43) isn't Apple Maps but the
Google Maps web application.
Save the form in the folder with the reference data, and tackle the script that makes the workflow happen.
The workflow script
Workflow scripts don't differentiate between mobile- and web-submissions. Why on earth would they, honestly?
Up to a point: because of its data structure, form submission data coming from the legacy Mobilengine form language is handled differently on the server.
What you know about scripting works just as well for webforms as it did for forms submitted from a mobile client.
The script that processes the newTask submission isn't very
complex: it just takes all the input fields, and calls a reftable.Insert() method to add a new row with the
submitted
values.
server program addTask for form newTask
using reftab assignments;
{
    db.assignments.Insert({assignment_id:guid.Generate().ToStringN(),
                        usr:form.deliveryData.driver.selectedKey,
                        client:form.client.selectedText,
                        load_type:form.deliveryData.loadType.selectedKey,
                        load_address:form.deliveryData.loadAddress.text,
                        unload_address:form.deliveryData.unloadAddress.text,
                        due_date:form.deliveryData.dueDate.date.DtlToDtdb(),
                        status:"Assigned"});
}
Keep
in mind that just like every other control type, chaptercontrols with an id define their own data-binding scope, but those without do not.
Save all the solution artifacts in a shared folder, and publish via the
mebt just as before. Open the New
Task form on the webforms site, fill it in, and click
Submit in the top right-hand corner.
Check that your new delivery task has been added: click the Go to Backoffice link (see the screenshot above), and export the reference data from the Input data tab the way you've already seen. Scroll down to the bottom of the spreadsheet that opens automatically, and find your data in a brand new row.
And with that, you've cranked adding new deliveries online up to 11. The Rocky Jupiter delivery workflow is now a self-contained Mobilengine solution: admins take new purchase orders and assign them to drivers whose mobile devices notify them of new tasks and provide an interface for going through the associated workflow.
Allow office employees to view and edit the contact list
Your contact list solution was splendidly received by Rocky Jupiter management, and they thought 'Why should drivers have all the fun?' They're wondering whether you could create a web-based version so that office admins can look at and modify the list too. You've hit the jackpot: you'll get money for jam with this assignment.
All you need to do is take the solution forms, and change their
platforms field to ios
web.
Don't
forget to do the same to editor.fls.xml.
Save and publish, then check online!
Figure 155. The browser-based contact list is practically indistinguishable from its mobile counterpart
That really couldn't have been easier.
Note that though the icon for the Call option is displayed, the click-to-call functionality is, unsurprisingly, missing from browser-based forms.
You've reached the edge of the Content-continent in the Form-creation world. Enjoy the view while you may, for it's time to sail to Formatting-land and explore styles.


